

There’s something undeniably nostalgic and comforting about the smell of chocolate chip cookies baking in the oven. I’ve been baking for years, and while I love the classic round cookies, sometimes I crave something even simpler and more satisfying—like these Chewy Chocolate Chip Cookie Bars. This recipe was born out of a moment when I didn’t have time to scoop out individual cookies but still wanted that same gooey, chocolatey flavor. One big pan, one bake, and a whole lot of deliciousness.
What I love most about these cookie bars is how easy they are to whip up without sacrificing any of the richness or chewiness of traditional cookies. They’re soft in the center, with slightly crisp edges, and packed with melty chocolate chips in every bite. Whether I’m baking for a quick family dessert or prepping a treat for a get-together, this recipe never disappoints. It’s also a hit with kids and adults alike, and I often find myself making a second batch because the first one disappears too quickly.
You’ll love this recipe because it’s incredibly versatile. Want to swap the chocolate chips for white chocolate, butterscotch, or even peanut butter chips? Go ahead. Feel like adding chopped nuts, shredded coconut, or dried cranberries? You can do that too. The base dough is a dream to work with and handles all sorts of mix-ins beautifully.
It’s also affordable, using pantry staples you likely already have on hand—no need for fancy ingredients. It’s perfect for those last-minute dessert cravings or unexpected guests. And since it’s baked in a single pan, there’s minimal cleanup involved, which is always a plus in my book.
Here’s what you’ll need to make these delicious Chewy Chocolate Chip Cookie Bars:
Ingredients:
-
1 cup unsalted butter, melted
-
1 cup brown sugar, packed
-
½ cup granulated sugar
-
2 large eggs
-
2 teaspoons vanilla extract
-
2 ¼ cups all-purpose flour
-
1 teaspoon baking soda
-
½ teaspoon salt
-
2 cups semi-sweet chocolate chips
How to Prepare Chewy Chocolate Chip Cookie Bars
These Chewy Chocolate Chip Cookie Bars come together in no time, which is why they’ve become one of my go-to desserts. There’s no chilling, rolling, or portioning required—just mix, spread, and bake. It’s a straightforward recipe with quick and easy steps that anyone can follow, even if you’re a beginner in the kitchen. Let’s break it down step by step so you can enjoy a warm, chewy square of goodness in under an hour.
Step-by-Step Instructions:
Step 1: Prepare Your Pan and Oven
Start by preheating your oven to 350°F (175°C). Line a 9×13-inch baking pan with parchment paper, leaving some overhang for easy removal. If you don’t have parchment, lightly grease the pan with nonstick spray or butter. This ensures your cookie bars release cleanly from the pan after baking.
Step 2: Melt the Butter
In a large microwave-safe bowl, melt the unsalted butter. This should take about 30 to 45 seconds, depending on your microwave. Let it cool slightly so it doesn’t cook the eggs in the next step. Using melted butter helps achieve that rich, chewy texture we’re aiming for.
Step 3: Mix the Wet Ingredients
To the melted butter, add the brown sugar and granulated sugar. Stir until well combined and smooth. Next, mix in the eggs one at a time, blending thoroughly after each addition. Stir in the vanilla extract. This mixture should be glossy and thick.
Step 4: Combine the Dry Ingredients
In a separate bowl, whisk together the all-purpose flour, baking soda, and salt. Slowly add the dry mixture to the wet ingredients. Mix just until everything is fully incorporated. Don’t overmix—this helps keep the bars tender and soft.
Step 5: Fold in the Chocolate Chips
Once your dough is smooth, gently fold in the chocolate chips. I like to reserve a small handful to press on top of the dough before baking. It gives the finished bars that beautiful bakery-style look.
Step 6: Spread the Dough into the Pan
Transfer the dough into your prepared baking pan. Use a spatula or your fingers to press it evenly across the bottom. Take your time here—an even layer ensures uniform baking and texture throughout.
Step 7: Bake to Perfection
Bake in the preheated oven for 25 to 30 minutes, or until the top is golden and set. The center should still be slightly soft—it will continue to cook a bit as it cools. For extra gooeyness, remove it from the oven closer to the 25-minute mark. For firmer bars, bake slightly longer.
Step 8: Cool and Slice
Allow the bars to cool in the pan for at least 20 minutes. Then, use the parchment paper overhang to lift them out and transfer to a cutting board. Slice into squares or rectangles, depending on how large you want your portions.
These bars are incredibly customizable. You can use white chocolate chips, chopped nuts, crushed pretzels, or even swirl in a bit of peanut butter or caramel sauce before baking. They adapt beautifully to your favorite flavors and add-ins.
One of the reasons this recipe is popular with so many people is its universal appeal. It’s a crowd-pleaser at parties, bake sales, school lunches, and family gatherings. And because you can make a whole batch in one go, it’s perfect for sharing (if you can resist eating them all yourself). Whether you enjoy them warm with a scoop of vanilla ice cream or cool with a cup of coffee, these chewy chocolate chip cookie bars always deliver on taste and texture.
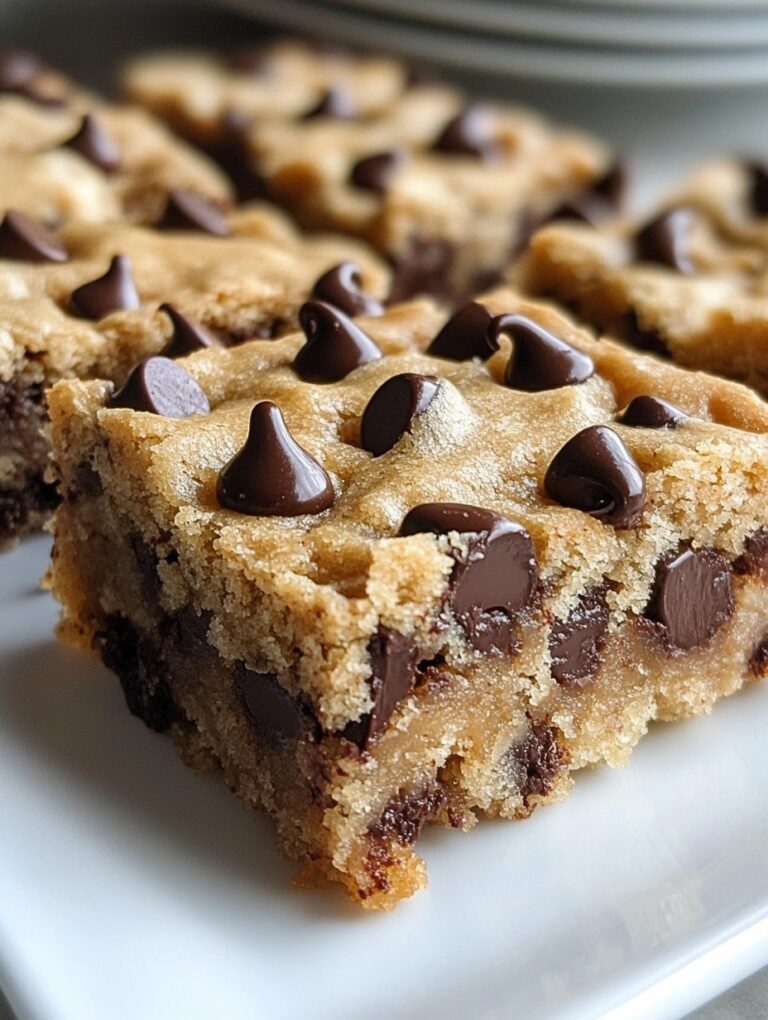
Chewy Chocolate Chip Cookie Bars
These Chewy Chocolate Chip Cookie Bars are the perfect solution when you need a quick, crowd-pleasing dessert. They’re soft, gooey, and full of melty chocolate chips, with minimal prep and clean-up. Baked in one pan, this recipe skips the hassle of portioning individual cookies, making it ideal for busy days, parties, and anytime you crave something sweet and comforting.
- Total Time: 40 minutes
- Yield: 24 1x
Ingredients
- 1 cup unsalted butter, melted
- 1 cup brown sugar, packed
- ½ cup granulated sugar
- 2 large eggs
- 2 teaspoons vanilla extract
- 2 ¼ cups all-purpose flour
- 1 teaspoon baking soda
- ½ teaspoon salt
- 2 cups semi-sweet chocolate chips
Instructions
- Preheat the oven to 350°F (175°C). Line a 9×13-inch baking pan with parchment paper, leaving a slight overhang on the sides for easy lifting.
- Melt the butter in a large microwave-safe bowl and let it cool slightly.
- Add both sugars to the melted butter and stir until smooth and well combined.
- Mix in the eggs, one at a time, ensuring each is fully blended before adding the next. Stir in the vanilla extract.
- In a separate bowl, whisk together the flour, baking soda, and salt.
- Gradually add the dry ingredients to the wet mixture, stirring until just combined.
- Fold in the chocolate chips, reserving a small handful to sprinkle on top of the dough.
- Spread the dough evenly into the prepared pan using a spatula or clean hands.
- Sprinkle the reserved chocolate chips on top and gently press them into the surface.
- Bake for 25 to 30 minutes, or until the top is golden and the center is just set.
- Remove from the oven and allow the bars to cool in the pan for 20 minutes.
- Lift the bars out using the parchment overhang and transfer to a cutting board.
- Slice into bars of your desired size and serve.
Notes
For added texture, mix in ½ cup of chopped nuts or shredded coconut.
To ensure soft bars, do not overbake—remove when the center is slightly soft.
You can use chocolate chunks or a blend of chips for variation.
Store leftovers in an airtight container for up to 4 days at room temperature.
For a firmer texture, refrigerate the bars before slicing.
- Prep Time: 10
- Cook Time: 30
FAQs
Can I make these cookie bars ahead of time?
Yes, absolutely! These bars keep very well. Once cooled, store them in an airtight container at room temperature for up to 4 days. You can also refrigerate them for up to a week if you prefer a firmer texture. For longer storage, wrap them tightly and freeze for up to 2 months.
Can I use salted butter instead of unsalted?
Yes, you can use salted butter. If you do, reduce the added salt in the recipe by half. This helps keep the overall flavor balanced and not overly salty.
What can I use instead of chocolate chips?
Feel free to substitute chocolate chips with white chocolate, milk chocolate, peanut butter chips, or chopped chocolate bars. You can also mix in chopped nuts, shredded coconut, or dried fruit for added texture and flavor variety.
How do I know when the bars are done baking?
The bars are done when the edges are golden brown and the center is set but still soft. A toothpick inserted in the center should come out with a few moist crumbs—avoid overbaking, as that will make them dry instead of chewy.
Can I double the recipe?
Yes, you can double the recipe and bake it in a larger pan (such as 11×15 inches), or bake two separate batches. Be sure to adjust the baking time slightly—check for doneness by observing the center and edges.
Are these cookie bars suitable for kids?
Definitely. These bars are a kid favorite and are perfect for school snacks, parties, and lunchbox treats. They contain no nuts unless you choose to add them, making them ideal for nut-free environments when prepared accordingly.
What’s the best way to cut the bars cleanly?
To get clean edges, let the bars cool completely before slicing. Use a sharp knife, and wipe it between cuts. You can also refrigerate the bars for 30 minutes before cutting if you prefer sharper, more defined edges.
Can I make them gluten-free?
Yes, use a 1:1 gluten-free baking flour blend. Make sure it includes xanthan gum or a binding agent for the best texture. The result will still be chewy and satisfying.