

I still remember the first time I made this Lemon Raspberry Pie. It was a warm afternoon, and I was craving something light but indulgent—something that could satisfy a sweet tooth without feeling too heavy. I had fresh raspberries in the fridge and a few lemons on the counter. That combination sparked a delicious idea, and this creamy, tangy, and fruity pie was born.
Every time I make this pie, it brings back the feeling of summer—bright, zesty, and refreshing. The contrast between the tart lemon filling and the natural sweetness of the raspberries is simply irresistible. The smooth, creamy texture pairs beautifully with a buttery crust, making each bite melt in your mouth. Whether it’s served after a dinner party or as a midday treat with a cup of tea, this pie always hits the mark.
Why You Will Love This Recipe
This pie isn’t just about flavor—it’s about experience. The luscious lemon base gives it a vibrant kick, while the burst of fresh raspberries adds a delicate fruity twist. It strikes the perfect balance between sweet and tangy, which is why it has become a staple in my recipe collection. If you’re someone who enjoys citrusy desserts with a creamy texture, this one is going to become a favorite.
Versatile
What I love most about this Lemon Raspberry Pie is how adaptable it is. You can make it with a graham cracker crust, a shortbread crust, or even a simple pastry crust. It can be dressed up with piped whipped cream for a dinner party or served casually with a dusting of powdered sugar. You can even swap out raspberries for blueberries or strawberries if you like.
Affordable
Another reason I return to this recipe so often is that it’s budget-friendly. Lemons, raspberries, eggs, and cream cheese are all accessible ingredients, and you don’t need anything fancy or expensive to create a stunning dessert. It’s a wonderful way to make the most of seasonal fruit without spending a fortune.
Ingredients for the Recipe
To prepare this Lemon Raspberry Pie, you’ll need the following:
-
1 9-inch graham cracker pie crust (store-bought or homemade)
-
1 cup fresh raspberries (plus more for garnish if desired)
-
1 package (8 oz) cream cheese, softened
-
1 can (14 oz) sweetened condensed milk
-
1/2 cup freshly squeezed lemon juice (about 2–3 lemons)
-
1 tablespoon lemon zest
-
1 teaspoon vanilla extract
-
Whipped cream for topping (optional)
How to Prepare This Recipe
Making this Lemon Raspberry Pie is both simple and enjoyable. It’s a straightforward process that doesn’t require advanced baking skills, yet the result is a pie that looks and tastes like it came from a professional bakery. It’s the kind of dessert that impresses without overwhelming you in the kitchen.
Step-by-Step Instructions for Preparation
Step 1: Prepare the Pie Crust
Start with your pie crust. If you’re using a store-bought graham cracker crust, it’s ready to go. If you’re making it from scratch, blend 1½ cups of graham cracker crumbs with ¼ cup of sugar and 6 tablespoons of melted butter. Press the mixture into a 9-inch pie dish and bake at 350°F (175°C) for about 8 minutes. Let it cool completely before adding the filling.
Step 2: Soften the Cream Cheese
In a large mixing bowl, add the softened cream cheese. Use a hand mixer or stand mixer to beat it until it’s smooth and free of lumps. This step is essential because the cream cheese forms the creamy base of the pie.
Step 3: Add Sweetened Condensed Milk
Gradually pour in the sweetened condensed milk while continuing to beat the mixture. Blend it in slowly to ensure a smooth, creamy consistency without clumps.
Step 4: Mix in Lemon Juice, Zest, and Vanilla
Next, add the freshly squeezed lemon juice, lemon zest, and vanilla extract. Continue mixing until all ingredients are fully incorporated. The lemon juice will start to thicken the filling slightly, giving it that rich, velvety texture.
Step 5: Layer the Raspberries
Place the fresh raspberries evenly across the bottom of the cooled pie crust. These berries provide the sweet contrast to the tangy lemon filling, and their vibrant color makes each slice visually appealing.
Step 6: Pour the Filling Over the Raspberries
Carefully pour the lemon-cream mixture over the raspberries, spreading it evenly. Use a spatula to smooth the top, ensuring the filling reaches all edges of the crust.
Step 7: Chill the Pie
Place the pie in the refrigerator for at least 4 hours, preferably overnight. This allows the filling to set fully and develop its creamy texture. It’s important not to rush this step, as chilling helps the pie hold its shape when sliced.
Step 8: Garnish Before Serving
Before serving, you can add a topping of whipped cream if desired. Add a few extra raspberries or a sprinkle of lemon zest for a fresh, decorative touch. The visual contrast between the white cream, red berries, and golden crust is stunning.
Quick and Easy
This recipe doesn’t require baking the filling, which makes it perfect for warm days when you want a no-fuss dessert. The most time-consuming part is waiting for it to chill, but the actual preparation takes less than 20 minutes. It’s ideal for beginner bakers or anyone short on time.
Customizable
While lemon and raspberry make a winning pair, this recipe is versatile enough to accommodate substitutions. You can use blueberries, strawberries, or blackberries in place of raspberries. For the crust, feel free to swap graham crackers with vanilla wafers or digestive biscuits. You could even add a swirl of raspberry puree through the filling for extra flavor and color.
Popular with Many People
Every time I bring this pie to a gathering, it disappears within minutes. Guests love how refreshing it is, especially after a heavy meal. It’s kid-friendly, yet sophisticated enough to serve at adult dinner parties. Its creamy texture, combined with that citrus zing, creates a dessert that pleases almost everyone.
Print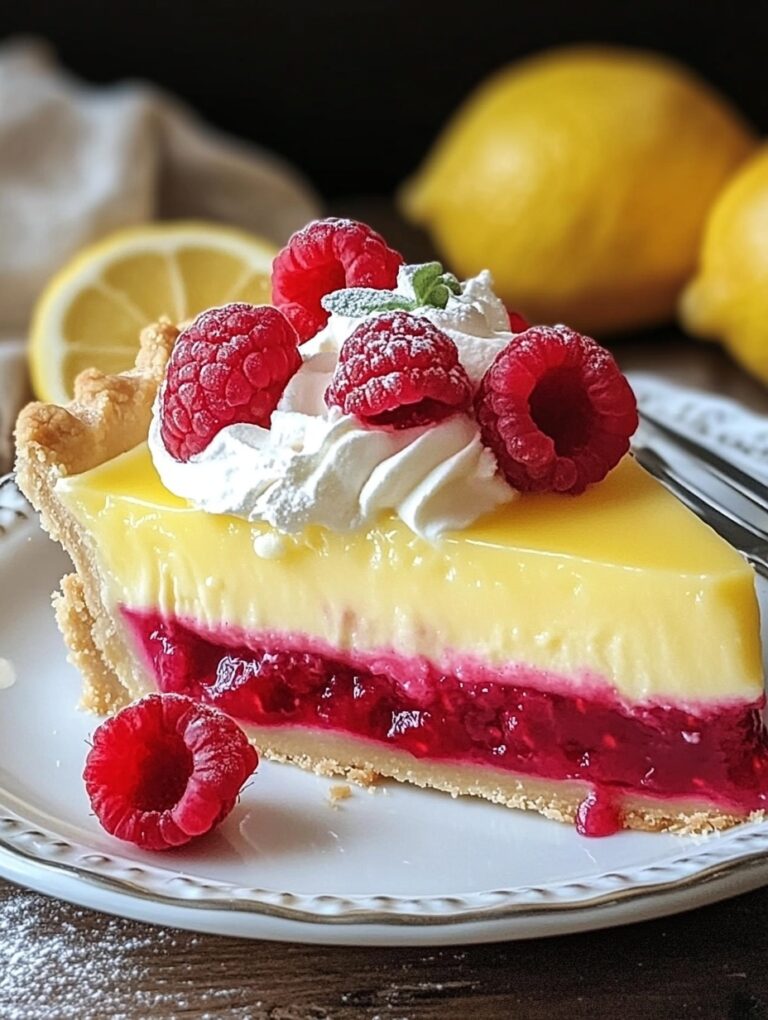
Lemon Raspberry Pie – Light, Refreshing, and So Creamy
This Lemon Raspberry Pie is a refreshing and creamy dessert that’s perfect for any season. With a smooth lemon filling, bursts of juicy raspberries, and a buttery crust, this pie is easy to make, light on ingredients, and full of flavor. Whether you’re hosting a gathering or simply treating yourself, this recipe delivers the perfect balance of citrus and sweetness in every bite.
- Total Time: 28 minutes
- Yield: 8 1x
Ingredients
- 1 9-inch graham cracker crust (homemade or store-bought)
- 1 cup fresh raspberries (plus extra for garnish)
- 1 package (8 oz) cream cheese, softened
- 1 can (14 oz) sweetened condensed milk
- 1/2 cup freshly squeezed lemon juice (from 2–3 lemons)
- 1 tablespoon lemon zest
- 1 teaspoon vanilla extract
- Whipped cream for topping (optional)
Instructions
- If making your crust from scratch, mix 1½ cups graham cracker crumbs with ¼ cup sugar and 6 tablespoons melted butter. Press into a 9-inch pie dish and bake at 350°F (175°C) for 8 minutes. Let cool.
- In a mixing bowl, beat the softened cream cheese until completely smooth and creamy. This step is essential for a lump-free filling.
- Slowly pour in the sweetened condensed milk while beating. Continue mixing until the two are fully combined and silky.
- Add lemon juice, lemon zest, and vanilla extract to the mixture. Blend again until the filling thickens slightly and becomes smooth.
- Evenly distribute the raspberries over the bottom of the cooled pie crust. Make sure to cover the base for a balanced raspberry bite in each slice.
- Carefully pour the lemon-cream filling over the raspberries. Use a spatula to spread it out smoothly and evenly to the edges of the crust.
- Refrigerate the pie for at least 4 hours, or preferably overnight, until fully set and firm to the touch.
- Before serving, optionally top with whipped cream and garnish with additional raspberries or a sprinkle of lemon zest.
Notes
Ensure cream cheese is completely softened before mixing to avoid lumps.
Use only fresh lemon juice for best flavor. Bottled juice may alter the taste.
Raspberries can be gently patted dry to reduce moisture before layering.
For a firmer texture, allow the pie to chill overnight.
Avoid topping with whipped cream until ready to serve, especially if storing.
- Prep Time: 20
- Cook Time: 8
FAQs
Can I use frozen raspberries instead of fresh ones?
Yes, you can use frozen raspberries, but make sure to thaw and drain them thoroughly before adding them to the pie. Excess moisture can affect the texture of the filling.
How long does this pie need to chill?
The pie should chill for at least 4 hours to fully set, but for the best results, let it sit overnight. This gives it time to firm up and makes slicing easier.
Can I make this pie ahead of time?
Absolutely. This pie is ideal for preparing a day in advance. Store it in the refrigerator, covered, and garnish it just before serving for the freshest look and taste.
Is there a substitute for sweetened condensed milk?
You can use a homemade version by simmering milk with sugar until thickened, but the consistency might vary. For best results, stick to canned sweetened condensed milk.
What’s the best crust for this pie?
A graham cracker crust works perfectly, but you can also try a shortbread or vanilla wafer crust. Each option complements the lemon-raspberry flavor in a unique way.
Can I freeze the pie?
Yes, you can freeze the pie for up to one month. Wrap it tightly in plastic wrap and foil. Thaw in the refrigerator overnight before serving. For best texture, avoid freezing if it’s topped with whipped cream.
Is this recipe suitable for people with dietary restrictions?
This pie contains dairy and gluten. To make it gluten-free, use a gluten-free crust. For a dairy-free version, you would need to use plant-based cream cheese and condensed coconut milk, but texture and taste may vary.