
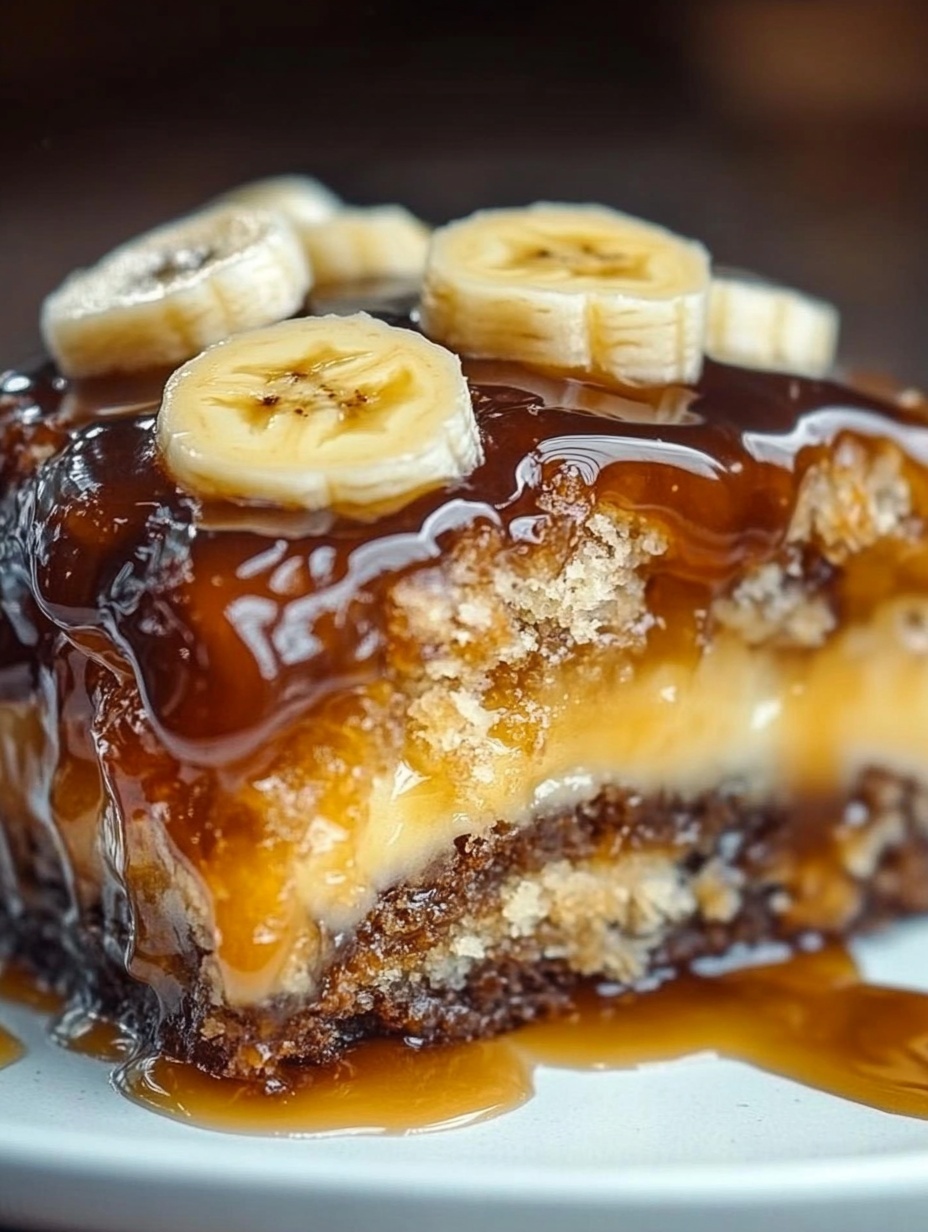
There is something so heartwarming about baking with bananas. I have always loved how a simple bunch of ripe bananas can transform into the sweetest treat in my kitchen. This recipe, Crazy Banana Cake Meets Upside Down Magic, is one of those bakes that takes me back to family gatherings, where the aroma of bananas and caramel filled the air. The first time I made it, I remember being amazed at how the cake flipped out of the pan with such beauty—glossy slices of banana nestled into a caramel glaze, making every slice a picture-worthy masterpiece. It’s more than just a dessert; it’s a story of creativity, comfort, and a little bit of fun magic.
Why will you love this recipe? Because it is a perfect blend of rustic simplicity and irresistible sweetness. The caramelized banana topping gives the cake a golden, sticky finish that contrasts beautifully with the soft and moist banana sponge beneath. It’s the kind of dessert that looks impressive enough to serve at special gatherings, yet easy enough to whip up on a cozy afternoon. Every bite is sweet, buttery, and bursting with banana flavor, making it hard to resist a second slice.
Another reason this cake shines is its versatility. You can enjoy it warm, fresh out of the oven, with a scoop of vanilla ice cream melting on top, or serve it chilled the next day as a delightful tea-time snack. It works wonderfully as a dessert centerpiece for celebrations or as a simple homemade treat for family nights. You can even tweak it with add-ins like chocolate chips, nuts, or a drizzle of caramel sauce for extra indulgence.
Affordability is also a big win with this recipe. Bananas are among the most budget-friendly fruits, and the rest of the ingredients are simple pantry staples that you probably already have at home. There’s no need for expensive or hard-to-find products, which makes this cake accessible to everyone. With just a handful of ingredients and a little bit of time, you’ll create a cake that tastes like it came straight from a bakery.
Ingredients for the recipe:
-
Ripe bananas (for both the topping and the cake batter)
-
Brown sugar
-
Granulated sugar
-
Butter
-
Eggs
-
All-purpose flour
-
Baking soda
-
Baking powder
-
Salt
-
Vanilla extract
-
Milk
How to Prepare This Recipe
Making this Crazy Banana Cake Meets Upside Down Magic is a rewarding process that balances simplicity with a touch of flair. The steps are easy to follow, and the result is a cake that never fails to impress. I will guide you step by step so you can enjoy this upside-down banana magic in your own kitchen.
Step-by-step instructions for preparation
Step 1: Prepare the topping
Start by preheating your oven to 175°C (350°F). Grease a round or square cake pan generously with butter. Melt a portion of butter and combine it with brown sugar to create a smooth caramel mixture. Spread this mixture evenly over the bottom of your pan. Slice ripe bananas into thin, even rounds or lengthwise strips, then arrange them neatly on top of the caramel layer. This will form the stunning upside-down topping that shines once the cake is baked and flipped.
Step 2: Mash the bananas
Take three to four ripe bananas for the batter. Mash them thoroughly in a bowl until smooth. Overripe bananas with brown spots work best because they bring out natural sweetness and rich flavor.
Step 3: Cream butter and sugar
In a large mixing bowl, cream softened butter with granulated sugar until light and fluffy. This step ensures the cake has a tender crumb and a delightful texture.
Step 4: Add eggs and vanilla
Beat in the eggs one at a time, mixing well after each addition. Stir in the vanilla extract to add depth to the cake’s flavor.
Step 5: Combine dry ingredients
In a separate bowl, whisk together all-purpose flour, baking soda, baking powder, and salt. This dry mixture will help the cake rise properly and keep it soft.
Step 6: Mix wet and dry ingredients
Gradually add the dry ingredients to the wet mixture, alternating with milk. Begin and end with the dry mixture for the best texture. Fold in the mashed bananas until everything is evenly incorporated. The batter will be thick, rich, and full of banana flavor.
Step 7: Assemble the cake
Carefully pour the banana cake batter over the caramel and banana slices in the prepared pan. Spread it evenly to cover the topping completely.
Step 8: Bake the cake
Place the pan in the preheated oven and bake for about 45–50 minutes, or until a toothpick inserted in the center comes out clean. The cake will turn golden brown, with the aroma of bananas and caramel filling the kitchen.
Step 9: Flip the cake
Once baked, remove the pan from the oven and allow it to cool for 10 minutes. Run a knife along the edges to loosen it. Place a large serving plate over the pan, then flip it quickly but carefully. Lift off the pan to reveal the glossy banana topping that gives the cake its magical upside-down charm.
Quick and easy
Even though the cake looks elegant, it doesn’t require complicated techniques. The most time-consuming part is arranging the bananas on top of the caramel, but even that is simple. The rest of the process uses basic mixing steps, so you don’t need advanced baking skills. It is straightforward enough for beginners, yet satisfying for experienced bakers too.
Customizable
One of the best aspects of this recipe is how adaptable it is. If you like a nutty crunch, you can add chopped walnuts or pecans to the batter. For chocolate lovers, fold in some chocolate chips or drizzle melted chocolate over the finished cake. You can also experiment with different spices, such as cinnamon or nutmeg, to give the cake a warm, comforting flavor. If you want a lighter version, reduce the sugar slightly or swap regular milk for almond or oat milk.
Popular with many people
This cake is always a crowd-pleaser. Guests love the dramatic upside-down reveal when the pan is flipped. Children enjoy the natural sweetness of bananas, while adults appreciate the nostalgic, homely flavor. It’s a dessert that bridges generations, appealing to both young and old. Whether served warm with a scoop of ice cream or chilled with a cup of tea, it never fails to disappear quickly at gatherings.
Print
Crazy Banana Cake Meets Upside Down Magic
Crazy Banana Cake Meets Upside Down Magic is a delightful dessert that combines the natural sweetness of ripe bananas with a rich caramel topping. This cake is perfect for gatherings, celebrations, or simply enjoying a cozy afternoon treat. Its dramatic upside-down presentation makes it both visually stunning and deliciously satisfying.
- Total Time: 1 hour 10 minutes
- Yield: 10 1x
Ingredients
For the topping:
- 4 tablespoons butter, melted
- ½ cup brown sugar
- 3–4 ripe bananas, sliced
For the cake batter:
- 3–4 ripe bananas, mashed
- ½ cup butter, softened
- ¾ cup granulated sugar
- 2 large eggs
- 1 teaspoon vanilla extract
- 1 ½ cups all-purpose flour
- 1 teaspoon baking soda
- 1 teaspoon baking powder
- ½ teaspoon salt
- ½ cup milk (or dairy-free alternative)
Instructions
- Preheat the oven to 175°C (350°F). Grease a 9-inch round or square cake pan with butter.
- In a small bowl, mix melted butter and brown sugar until smooth. Spread evenly at the bottom of the pan.
- Arrange sliced bananas on top of the caramel mixture.
- In a separate bowl, mash 3–4 bananas until smooth.
- In a large mixing bowl, cream softened butter and granulated sugar until light and fluffy.
- Beat in eggs one at a time, then stir in vanilla extract.
- In another bowl, whisk together flour, baking soda, baking powder, and salt.
- Gradually add dry ingredients to the wet mixture, alternating with milk, starting and ending with dry ingredients. Fold in mashed bananas until combined.
- Pour the batter evenly over the caramelized bananas in the pan.
- Bake for 45–50 minutes, or until a toothpick inserted in the center comes out clean.
- Allow the cake to cool for 10 minutes. Run a knife along the edges. Place a large plate over the pan and carefully flip the cake. Lift off the pan to reveal the banana topping.
Notes
For extra flavor, add ½ teaspoon cinnamon or a handful of chopped nuts to the batter.
Use overripe bananas for maximum sweetness.
Cake can be served warm with ice cream or chilled for a firmer texture.
- Prep Time: 20
- Cook Time: 50
FAQs
Q: Can I use frozen bananas for this cake?
A: Yes, frozen bananas work well as long as they are fully thawed and mashed before using. They may release extra moisture, so gently drain any excess liquid to maintain the batter’s consistency.
Q: How do I prevent the caramel from sticking to the pan?
A: Make sure to grease the pan thoroughly with butter and spread the brown sugar mixture evenly. Using a non-stick or silicone pan can also make flipping easier and cleaner.
Q: Can I make this cake ahead of time?
A: Absolutely. You can bake the cake a day before serving. Store it in an airtight container at room temperature. Reheat slices slightly before serving if you prefer a warm dessert.
Q: Can I substitute milk with a dairy-free alternative?
A: Yes, almond milk, oat milk, or soy milk work perfectly in this recipe and maintain the moist texture of the cake.
Q: How ripe should the bananas be?
A: The riper, the better. Look for bananas with brown spots—they provide maximum sweetness and natural banana flavor, which enhances the cake’s taste.
Q: Can I add extras like nuts or chocolate chips?
A: Definitely. Fold in your favorite add-ins for extra texture and flavor. Chopped walnuts, pecans, or chocolate chips complement the banana flavor beautifully.
Q: What if my cake cracks on top?
A: Minor cracks are normal due to rising. They do not affect taste or texture and are common in banana-based cakes.
Q: How should I store leftover cake?
A: Wrap slices tightly in plastic wrap or keep the whole cake in an airtight container. Refrigeration is optional, but it helps extend freshness for 3–4 days.