

There’s something so comforting about baking a pie in a cast iron skillet. I still remember the first time I made a cast iron apple pie—it filled my kitchen with the warm scent of cinnamon, butter, and apples bubbling together. The crust came out golden and crisp, while the filling was perfectly tender, with that rustic charm that only a skillet can create. For me, this recipe is more than just dessert; it’s a reminder of cozy afternoons, laughter around the table, and the simple joy of homemade baking.
You will love this recipe because it combines the richness of a flaky, buttery crust with the deep flavors of spiced apples. Unlike pies baked in traditional pans, a cast iron skillet creates even heat and a beautiful caramelization that makes each slice irresistible. The edges of the crust crisp up beautifully, and the filling cooks evenly without becoming mushy. It’s the kind of dessert that looks impressive yet feels wonderfully down-to-earth.
Another reason this pie is so special is its versatility. You can serve it warm with a scoop of vanilla ice cream for a comforting dessert, or you can enjoy it at room temperature with a cup of coffee or tea. It’s equally perfect for Sunday family gatherings, holidays, or simply when you’re craving something sweet after dinner. If you want to switch things up, you can add a handful of berries, swap the spices, or even drizzle caramel sauce over the top for an extra indulgent touch.
Affordability also makes this recipe a winner. Apples are inexpensive and available year-round, and the rest of the ingredients are staples you likely already have in your pantry—flour, sugar, butter, and spices. With such accessible ingredients, you can whip up this pie anytime without breaking the budget. That makes it a recipe you’ll want to return to again and again.
Ingredients for the Recipe
-
6 medium apples (Granny Smith or Honeycrisp work best)
-
1 tablespoon lemon juice
-
¾ cup granulated sugar
-
¼ cup brown sugar
-
2 tablespoons all-purpose flour
-
1 teaspoon ground cinnamon
-
¼ teaspoon ground nutmeg
-
¼ teaspoon ground allspice
-
¼ teaspoon salt
-
2 tablespoons unsalted butter, cut into small pieces
-
1 package refrigerated pie crusts (or homemade crust, enough for top and bottom)
-
1 egg, beaten (for egg wash)
-
1 tablespoon coarse sugar (for sprinkling on top)
How to Prepare This Recipe
Baking a cast iron apple pie is much simpler than it looks, and the results are always worth the effort. This method gives you a flaky, golden crust and a sweet, spiced filling that feels both rustic and comforting. With just a few steps, you’ll have a dessert that’s ready to impress family and friends.
Step-by-Step Instructions for Preparation
Step 1: Prepare the apples
Start by peeling, coring, and slicing the apples into thin, even wedges. Place them in a large mixing bowl and drizzle the lemon juice over the slices to keep them from browning. Sprinkle in the granulated sugar, brown sugar, flour, cinnamon, nutmeg, allspice, and salt. Toss everything together until the apple slices are evenly coated with the mixture. Set the bowl aside while you prepare the crust.
Step 2: Prepare the skillet and bottom crust
Take your cast iron skillet and lightly grease it with butter to prevent sticking. Roll out one pie crust and gently press it into the bottom and sides of the skillet. Make sure it extends slightly over the edges, as this will help seal the pie later.
Step 3: Add the apple filling
Pour the spiced apple mixture into the crust, spreading it evenly. Dot the filling with small pieces of butter to help create a rich, glossy sauce as it bakes. The butter will melt into the apples, enhancing both the flavor and texture of the filling.
Step 4: Add the top crust
Roll out the second crust and carefully place it over the apples. You can use a full crust or cut it into strips to create a lattice design. If using a full crust, cut a few slits in the center to allow steam to escape. Press the edges of the top and bottom crusts together, then crimp them for a decorative finish. Brush the surface with the beaten egg to achieve a golden shine, and sprinkle with coarse sugar for a slight crunch.
Step 5: Bake the pie
Place the skillet in a preheated oven at 375°F (190°C). Bake for 45 to 55 minutes, or until the crust is golden brown and the apple filling is bubbling through the slits. If the edges begin to brown too quickly, cover them with strips of foil to prevent burning.
Step 6: Cool and serve
Once baked, remove the pie from the oven and let it cool on a wire rack for at least 30 minutes. This resting period allows the filling to thicken slightly, making it easier to slice. Serve the pie warm with ice cream, whipped cream, or simply on its own.
Quick and Easy
Even though this pie looks like a classic bakery creation, it doesn’t take much effort. Using refrigerated pie crusts saves time, and preparing the filling requires only peeling and mixing. From start to finish, this recipe fits perfectly into a busy schedule while still delivering a homemade, bakery-style dessert.
Customizable
This recipe is wonderfully adaptable. You can adjust the spices depending on your taste—adding more cinnamon for warmth or a pinch of cardamom for a fragrant twist. If you prefer a less sweet pie, reduce the sugar slightly. You can also add berries for tartness, or drizzle caramel sauce over the baked pie for extra richness. For those who love texture, a crumb topping can replace the top crust, turning the recipe into a cast iron Dutch apple pie.
Popular with Many People
Cast iron apple pie is a recipe that appeals to almost everyone. It has the charm of a traditional apple pie but with a rustic skillet presentation that makes it stand out. Families love it because it’s a comforting dessert that can be shared easily, while guests enjoy its inviting appearance and delicious flavor. It’s the kind of recipe that often becomes a signature dish in households, requested again and again at gatherings and celebrations.
Print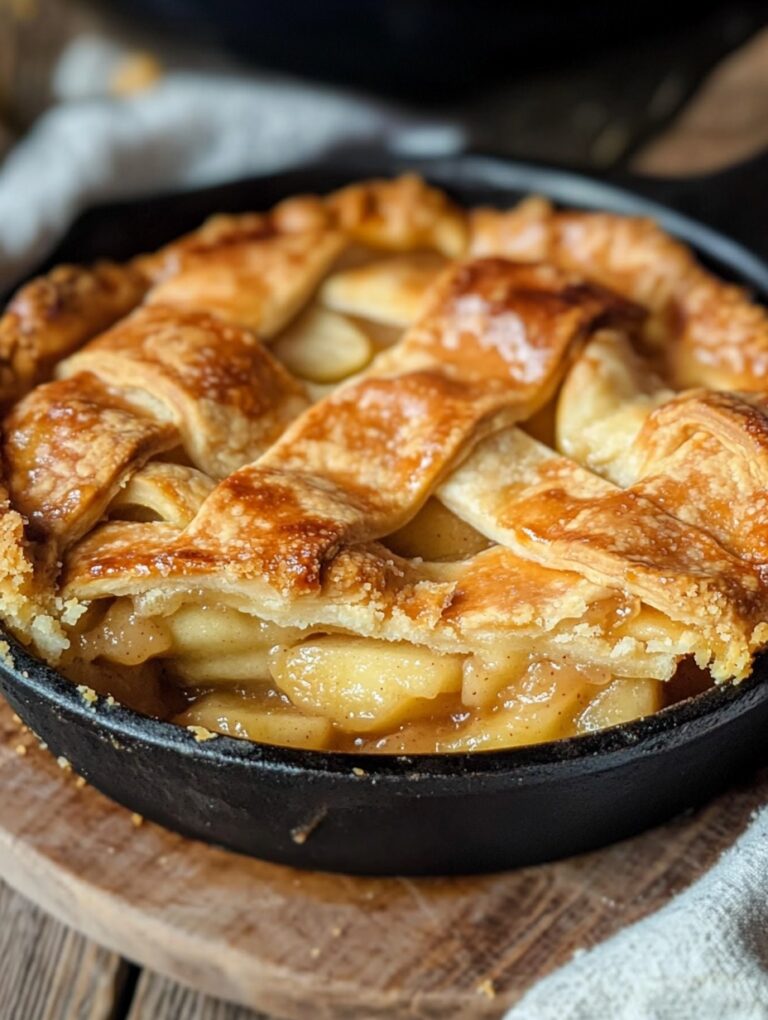
Iron Skillet Apple Pie
This cast iron apple pie is a rustic, comforting dessert that combines a flaky golden crust with a sweet spiced apple filling. Baking in a skillet creates a caramelized bottom crust and evenly cooked apples, making each bite irresistible.
- Total Time: 1 hour 15 minutes
- Yield: 8 1x
Ingredients
- 6 medium apples (Granny Smith or Honeycrisp)
- 1 tablespoon lemon juice
- ¾ cup granulated sugar
- ¼ cup brown sugar
- 2 tablespoons all-purpose flour
- 1 teaspoon ground cinnamon
- ¼ teaspoon ground nutmeg
- ¼ teaspoon ground allspice
- ¼ teaspoon salt
- 2 tablespoons unsalted butter, cut into pieces
- 2 pie crusts (refrigerated or homemade)
- 1 egg, beaten (for egg wash)
- 1 tablespoon coarse sugar (for topping)
Instructions
- Peel, core, and slice apples into thin wedges. Place them in a large bowl.
- Add lemon juice, granulated sugar, brown sugar, flour, cinnamon, nutmeg, allspice, and salt. Toss until apples are evenly coated.
- Lightly butter a cast iron skillet to prevent sticking. Roll out one crust and press it into the bottom and sides of the skillet, leaving slight overhang.
- Pour the apple mixture into the crust, spreading it evenly. Dot the filling with butter pieces.
- Roll out the second crust and place it on top of the filling. Cut slits for steam or make a lattice design. Seal edges by crimping.
- Brush the top crust with beaten egg and sprinkle with coarse sugar.
- Bake in a preheated oven at 375°F (190°C) for 45–55 minutes, until crust is golden and filling bubbles. Cover edges with foil if browning too fast.
- Remove from oven and let cool for at least 30 minutes before slicing and serving.
Notes
Use a mix of tart and sweet apples for best flavor.
Cover edges with foil halfway through baking to prevent over-browning.
Serve warm with vanilla ice cream or whipped cream.
- Prep Time: 25
- Cook Time: 50
FAQs
Can I make this pie ahead of time?
Yes, you can prepare the pie up to a day in advance. Bake it as directed, then let it cool completely. Store it at room temperature covered with foil, or refrigerate if you prefer. Before serving, you can warm it in the oven at a low temperature to restore its fresh-baked flavor.
What type of apples work best for this recipe?
Granny Smith and Honeycrisp are excellent choices because they hold their shape well during baking and provide a balance of sweetness and tartness. You can also combine a few varieties to create a more complex flavor. Avoid very soft apples, as they can turn mushy.
Do I need to use a cast iron skillet?
While this recipe is designed for cast iron, you can also use a deep pie dish or an oven-safe skillet. However, cast iron provides the best heat retention and creates a beautifully crisp crust with caramelized edges.
How should I store leftovers?
Leftover pie should be covered and stored in the refrigerator for up to four days. You can reheat slices in the oven or microwave. If you prefer, freeze individual slices tightly wrapped for up to two months.
Can I use a homemade crust instead of refrigerated crust?
Absolutely. A homemade crust will make the pie even more special. Just be sure to roll it thin enough to fit your skillet and still allow for folding or crimping the edges.