
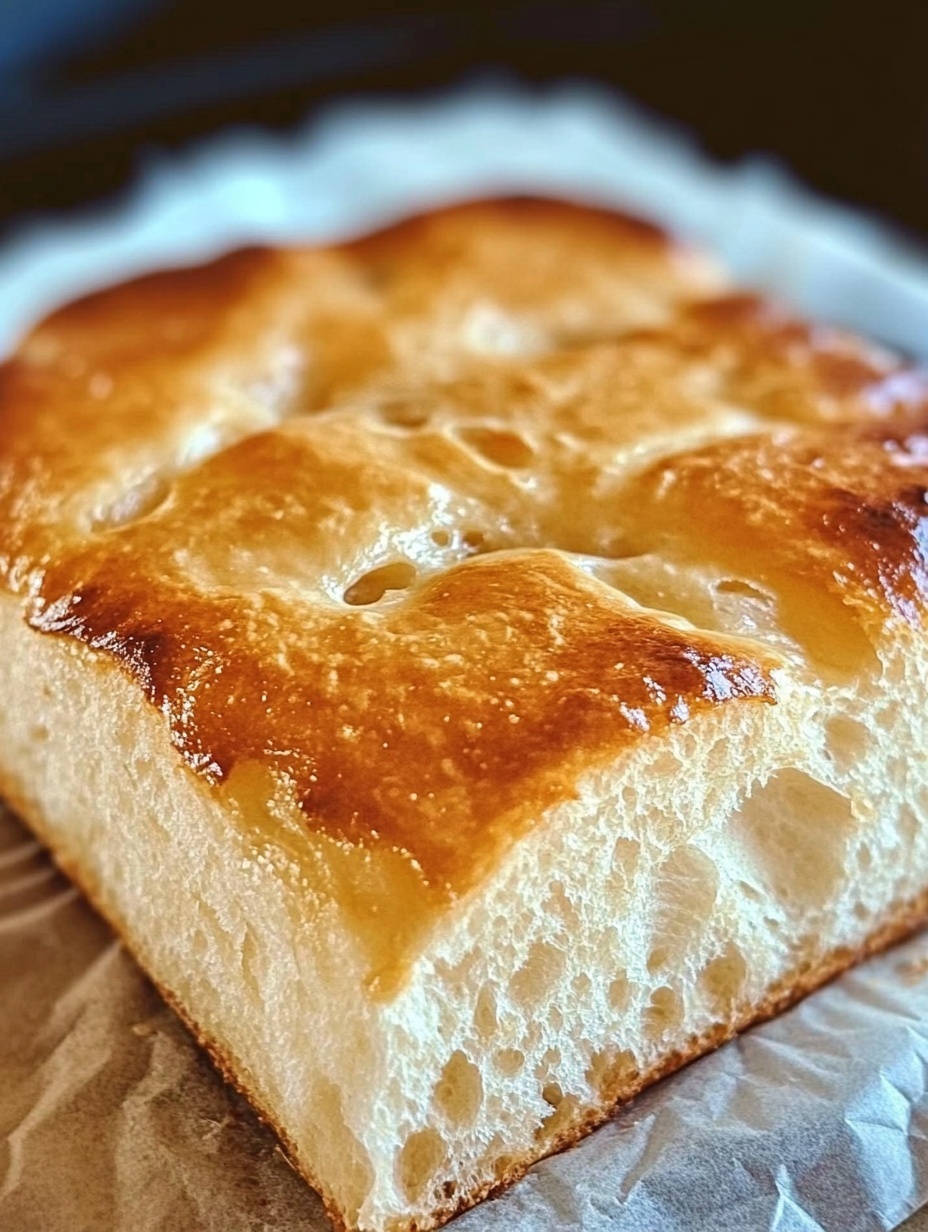
Baking bread has always been one of my favorite kitchen adventures, but not everyone has access to an oven. That’s why I created this No-Oven Stovetop Bread recipe. From the very first time I tried it, I was amazed at how soft, fluffy, and flavorful it turned out, all without ever using an oven. This recipe is a lifesaver for small kitchens, dorm rooms, or anyone who simply wants fresh bread without the wait or hassle of preheating an oven. The bread has a golden crust and a tender crumb, perfect for sandwiches, toast, or simply enjoying with butter and jam.
You will love this recipe because it’s surprisingly simple, incredibly quick, and requires only a few basic ingredients that you likely already have in your pantry. Plus, it produces a loaf that rivals many traditional baked breads in texture and taste. Its versatility makes it a staple recipe that can be adapted to sweet or savory preferences. You can add herbs, spices, or even seeds to customize it according to your mood or meal.
Another reason this recipe stands out is its affordability. There’s no need for expensive equipment or specialty flours. It’s a cost-effective way to enjoy homemade bread that doesn’t compromise on quality or flavor. This recipe also saves energy compared to using a conventional oven, making it both eco-friendly and economical.
This bread is ideal for those who want fresh, homemade bread without the complexity. You can make it early in the morning for breakfast, as an accompaniment to lunch, or for a quick snack in the afternoon. It’s incredibly versatile, pairing beautifully with soups, salads, sandwiches, or even as a base for bruschetta or garlic bread.
Ingredients:
-
2 cups all-purpose flour
-
1 cup warm water
-
1 tablespoon sugar or honey
-
1 teaspoon salt
-
1 tablespoon vegetable oil
-
1 tablespoon baking powder
-
Optional: 1–2 tablespoons chopped herbs or seeds for flavor
How to Prepare No-Oven Stovetop Bread
Preparing this No-Oven Stovetop Bread is straightforward, and the process is quick enough that you can enjoy fresh bread in under an hour. With simple steps, even beginners can achieve a soft, fluffy loaf with a golden crust. The key is to follow each step carefully, use the right heat, and allow the dough to rest properly.
Step-by-Step Instructions:
-
Mix the dry ingredients
In a large mixing bowl, combine 2 cups of all-purpose flour, 1 tablespoon of sugar or honey, 1 teaspoon of salt, and 1 tablespoon of baking powder. Stir well until the ingredients are evenly distributed. This ensures your bread rises uniformly. -
Add wet ingredients
Create a small well in the center of the flour mixture and pour in 1 cup of warm water and 1 tablespoon of vegetable oil. Gradually mix the ingredients using a spoon or your hands until a rough dough forms. -
Knead the dough
Transfer the dough onto a lightly floured surface. Knead it gently for about 5–7 minutes until it becomes smooth and elastic. Avoid over-kneading, as this can make the bread dense. -
Let the dough rest
Place the dough back in the bowl, cover it with a clean kitchen towel, and let it rest for 10–15 minutes. This allows the baking powder to activate fully and improves the texture of the bread. -
Shape the loaf
After resting, shape the dough into a round or oval loaf, depending on your skillet size. Make sure it is uniform in thickness so it cooks evenly. -
Preheat the skillet
Heat a heavy-bottomed skillet or frying pan over medium-low heat. Lightly grease the pan with a small amount of oil to prevent sticking. -
Cook the bread
Place the dough in the preheated skillet and cover it with a tight-fitting lid. Cook for 10–12 minutes on one side. Then carefully flip the bread and cook for another 10–12 minutes until the crust is golden and a toothpick inserted in the center comes out clean. -
Optional flavor additions
For extra flavor, you can mix herbs, seeds, or garlic powder into the dough before kneading. Sweet variations can include a teaspoon of cinnamon or dried fruit. -
Cool before slicing
Remove the bread from the skillet and allow it to cool on a wire rack for at least 5–10 minutes. Cooling ensures the crumb sets properly and slicing is easier.
This recipe is quick and easy, making it perfect for weekday breakfasts or last-minute meals. Its simplicity also allows for customization: add herbs, cheese, or seeds to suit your taste. Because it’s made on the stovetop, it’s popular with many people, including those without ovens or anyone looking for a faster bread-making method.
Print
No-Oven Stovetop Bread
This No-Oven Stovetop Bread is a quick, easy, and versatile bread recipe perfect for anyone without an oven. It produces a soft, fluffy loaf with a golden crust, ideal for sandwiches, toast, or as a side for soups and salads.
- Total Time: 40 minutes
- Yield: 1 1x
Ingredients
- 2 cups all-purpose flour
- 1 cup warm water
- 1 tablespoon sugar or honey
- 1 teaspoon salt
- 1 tablespoon vegetable oil
- 1 tablespoon baking powder
- Optional: 1–2 tablespoons chopped herbs or seeds for flavor
Instructions
- In a large mixing bowl, combine flour, sugar or honey, salt, and baking powder. Mix well.
- Make a small well in the center and pour in warm water and vegetable oil. Stir to form a rough dough.
- Knead the dough on a lightly floured surface for 5–7 minutes until smooth and elastic.
- Place the dough back in the bowl, cover with a kitchen towel, and let it rest for 10–15 minutes.
- Shape the dough into a round or oval loaf for even cooking.
- Preheat a heavy-bottomed skillet over medium-low heat and lightly grease it.
- Place the dough in the skillet and cover with a lid. Cook for 10–12 minutes on one side.
- Flip the bread carefully and cook for another 10–12 minutes until golden brown and fully cooked.
- Remove from the skillet and let it cool on a wire rack for 5–10 minutes before slicing.
- Optional: Add herbs, seeds, cheese, or spices to the dough for extra flavor.
Notes
Make sure the skillet is not too hot; medium-low heat prevents burning while allowing the bread to cook evenly.
Resting the dough is essential for soft, fluffy bread.
Customize with herbs, seeds, or sweet flavors like cinnamon for variety.
- Prep Time: 15
- Cook Time: 25
FAQs
Q: Can I use whole wheat flour instead of all-purpose flour?
A: Yes, you can substitute whole wheat flour, but the bread may be slightly denser. You might need to add a little more water to achieve the right dough consistency.
Q: How do I know when the bread is fully cooked?
A: The bread is done when it has a golden-brown crust on both sides and a toothpick inserted in the center comes out clean. It should sound hollow when tapped lightly on the bottom.
Q: Can I add cheese or herbs to the dough?
A: Absolutely. Herbs, seeds, or grated cheese can be mixed into the dough before kneading to enhance flavor. Adjust quantities according to your preference.
Q: How should I store leftover bread?
A: Let the bread cool completely, then wrap it in a clean kitchen towel or store it in an airtight container. It stays fresh for 1–2 days at room temperature.
Q: Can I freeze this stovetop bread?
A: Yes, slice the bread first, wrap it tightly in plastic wrap, and place it in a freezer-safe bag. Thaw at room temperature or toast slices directly from frozen.
Q: What if my bread is undercooked inside?
A: Reduce the heat slightly and cook for a few more minutes on each side. Covering the skillet with a lid helps the heat distribute evenly.