
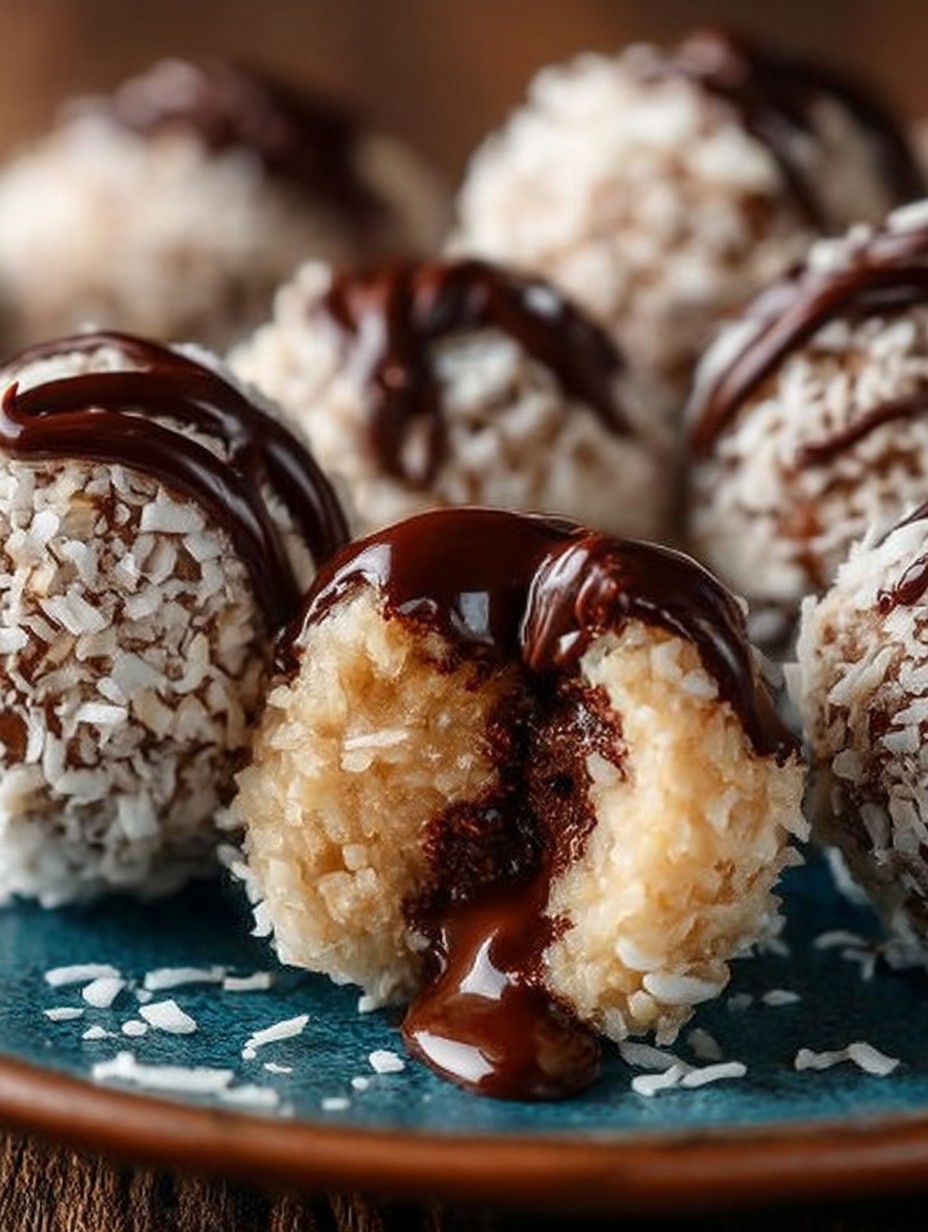
Imagine sinking your teeth into a rich, chocolatey ball that bursts with the tropical goodness of coconut, all while melting delightfully in your mouth. The contrast between the smooth chocolate and the chewy coconut creates a blissful explosion of flavor and texture—pure indulgence!
I first stumbled upon Chocolate Coconut Bliss Balls during a particularly ambitious attempt to impress my friends. Picture this: me, armed with cocoa powder and shredded coconut, trying not to make a mess as I channeled my inner culinary wizard. Let’s just say my kitchen looked like a scene from a cooking show gone wrong, but oh boy, were they delicious!
Why You’ll Love This Recipe
These Chocolate Coconut Bliss Balls are ridiculously easy to whip up—perfect for both novice cooks and seasoned chefs looking for a quick treat. The unique combination of chocolate and coconut results in a flavor profile that’s both familiar and exciting, leaving your taste buds dancing. Their stunning appearance makes them perfect for parties or just a cozy night in with Netflix. Plus, you can easily customize them by adding nuts, dried fruits, or even swapping out the sweeteners.
Ingredients for Chocolate Coconut Bliss Balls
How to Make Chocolate Coconut Bliss Balls
Follow these simple steps to prepare this delicious dish:
Step 1: Prepare Your Mixing Bowl
In a large mixing bowl, combine 1 cup of rolled oats, 1/2 cup of unsweetened cocoa powder, and 1 cup of shredded coconut. Use a whisk to mix these dry ingredients thoroughly until evenly blended.
Step 2: Add Wet Ingredients
Add 1/2 cup of maple syrup and 1/2 cup of nut butter to the dry mixture. Using a spatula or wooden spoon, stir everything together until it forms a cohesive dough-like consistency.
Step 3: Incorporate Chia Seeds
In a small bowl, mix 2 tablespoons of chia seeds with 6 tablespoons of water. Let this sit for about five minutes until it becomes gel-like. Once ready, fold this chia mixture into your dough until well combined.
Step 4: Form the Bliss Balls
With clean hands (or use gloves if you’re feeling fancy), scoop out about one tablespoon of the mixture and roll it into balls—aim for about 1 inch in diameter. Repeat this process until all the mixture is shaped into bliss balls.
Step 5: Chill to Perfection
Place your formed bliss balls on a baking sheet lined with parchment paper and refrigerate them for at least 30 minutes. This helps firm them up so they hold their shape beautifully!
Step 6: Serve & Enjoy
Once chilled, serve these delightful little bites on a platter or store them in an airtight container in the fridge for up to one week (if they last that long!). Garnish with extra shredded coconut on top before serving if you’re feeling extra fancy!
Now you have some delightful Chocolate Coconut Bliss Balls ready to charm everyone at your next gathering or simply satisfy your sweet tooth at home! Enjoy every bite—and don’t be surprised if you find yourself going back for seconds (or thirds).
Improving the Cooking Method

To create the perfect Chocolate Coconut Bliss Balls, start by mixing the dry ingredients and wet ones separately. This ensures even distribution of flavors, leading to blissful bites every time.
Decorate Your Dish with Your Personal Touch
Feel free to swap out the unsweetened shredded coconut for chopped nuts or use almond flour instead of regular flour for a nutty twist in your Chocolate Coconut Bliss Balls.
Smart Tips for Storage and Reheating
To maintain the delightful texture of your Chocolate Coconut Bliss Balls, store them in an airtight container in the fridge. This keeps them fresh and prevents them from drying out.
Practical Chef Advice
One time, I made these Chocolate Coconut Bliss Balls for a last-minute party, and they vanished faster than my favorite pair of socks in the dryer!
Conclusion for Chocolate Coconut Bliss Balls
Indulging in Chocolate Coconut Bliss Balls means treating yourself to a delightful snack that balances rich chocolatey flavors with the tropical essence of coconut. These bliss balls are not only simple to make but also packed with nutrients, making them an ideal pick-me-up for any time of the day. Whether you enjoy them as a post-workout snack or a sweet treat, their wholesome ingredients cater to both taste and health. Don’t wait—get into your kitchen and experience the joy of creating these delicious bites that will surely satisfy your sweet cravings!
Print
Chocolate Coconut Bliss Balls
Delicious chocolate coconut bliss balls recipe with detailed instructions and nutritional information.
- Total Time: 30 minutes
- Yield: 12 servings 1x
Ingredients
- 1 cup rolled oats
- 1/2 cup unsweetened cocoa powder
- 1 cup shredded coconut, unsweetened
- 1/2 cup maple syrup
- 1/2 cup nut butter (like almond or cashew)
- 2 tablespoons chia seeds
- 6 tablespoons water
Instructions
- In a large mixing bowl, combine 1 cup of rolled oats, 1/2 cup of unsweetened cocoa powder, and 1 cup of shredded coconut.
- Use a whisk to mix these dry ingredients thoroughly until evenly blended.
- Add 1/2 cup of maple syrup and 1/2 cup of nut butter to the dry mixture.
- Using a spatula or wooden spoon, stir everything together until it forms a cohesive dough-like consistency.
- In a small bowl, mix 2 tablespoons of chia seeds with 6 tablespoons of water.
- Let this sit for about five minutes until it becomes gel-like.
- Once ready, fold this chia mixture into your dough until well combined.
- With clean hands, scoop out about one tablespoon of the mixture and roll it into balls—aim for about 1 inch in diameter.
- Repeat this process until all the mixture is shaped into bliss balls.
- Place your formed bliss balls on a baking sheet lined with parchment paper and refrigerate them for at least 30 minutes.
- Once chilled, serve these delightful little bites on a platter or store them in an airtight container in the fridge for up to one week.
Notes
Store bliss balls in airtight container.
No reheating needed; enjoy chilled.
Serve with fresh fruit garnish.
Use desiccated coconut for best texture.
- Prep Time: 15 minutes
- Cook Time: 15 minutes
- Method: No-bake
Nutrition
- Calories: 200 kcal
- Sugar: 8g
- Sodium: 5mg
- Fat: 12g
- Carbohydrates: 22g
- Fiber: 3g
- Protein: 4g
- Cholesterol: 25mg
FAQs
How do I store Chocolate Coconut Bliss Balls?
To keep your Chocolate Coconut Bliss Balls fresh, store them in an airtight container in the refrigerator. They can last for up to one week, but you may find they disappear faster than that! For longer storage, you can freeze them for up to three months. Just make sure to separate each ball with parchment paper before freezing to prevent sticking.
Can I use a different nut instead of almonds?
Yes! If you prefer another nut, feel free to substitute almonds with cashews, walnuts, or pecans. Each nut will give your Chocolate Coconut Bliss Balls a unique flavor and texture while maintaining their delicious essence.
What if I don’t have maple syrup?
If maple syrup isn’t available, you can use honey or agave syrup as alternative sweeteners in your Chocolate Coconut Bliss Balls. Both options will maintain the sweetness and moisture needed for this recipe.
Can I make these bliss balls gluten-free?
Absolutely! The ingredients used in Chocolate Coconut Bliss Balls are naturally gluten-free. Just ensure that any added ingredients or brands you choose are certified gluten-free, especially if you’re particularly sensitive. Enjoy your bliss balls without worry!