

A short story about the recipe
When I first made a Burnt Basque Cheesecake, I remember being completely mesmerized by its rustic beauty. Unlike the smooth, flawless cheesecakes I used to bake, this one came out dark, caramelized, and almost “imperfect”—yet that was exactly what made it so charming. It had a silky center, a deeply golden top, and a rich aroma that filled my kitchen with warmth. I wanted to recreate that same magic in a simpler form, one that didn’t require a springform pan or a special occasion. That’s how my Burnt Basque Cheesecake in a loaf pan was born—same flavor, same creaminess, but easier, smaller, and more approachable for everyday baking.
Why you will love this recipe
You’ll fall in love with this cheesecake from the first bite. Its texture is creamy and custardy in the center, yet firm around the edges with a slightly bitter caramelized top that balances the sweetness perfectly. There’s no need for a water bath, no crust to prepare, and no stress over cracks—it’s a forgiving, foolproof dessert that delivers gourmet results. It’s one of those recipes that look fancy but are wonderfully easy to make. Whether you serve it chilled or at room temperature, it melts in your mouth with a unique depth of flavor you won’t find in traditional cheesecakes.
Versatile
This recipe is incredibly versatile. You can flavor the batter with a hint of lemon zest, a touch of vanilla extract, or even a spoonful of espresso for a more intense taste. Serve it plain, dusted with powdered sugar, topped with fresh berries, or drizzled with a light caramel sauce. It’s perfect for brunches, casual dinners, or as a make-ahead dessert for special occasions. Plus, it stores beautifully—just refrigerate and enjoy a slice whenever you crave something indulgent.
Affordable
Despite its luxurious taste, this Burnt Basque Cheesecake is surprisingly affordable. It uses simple pantry staples—cream cheese, sugar, eggs, and cream—that come together to create something truly extraordinary. You don’t need expensive equipment or rare ingredients to make it; a standard loaf pan does the trick perfectly. It’s an elegant dessert that feels high-end but remains budget-friendly, making it ideal for both home bakers and small-scale catering.
Ingredients for the recipe
-
16 oz (2 packages) cream cheese, softened
-
3/4 cup granulated sugar
-
3 large eggs
-
1 cup heavy cream
-
1/2 tsp vanilla extract
-
1/4 cup all-purpose flour
-
1/4 tsp salt
How to Prepare Burnt Basque Cheesecake in a Loaf Pan
Step-by-step instructions for preparation
When I bake this Burnt Basque Cheesecake, I like to start by preheating my oven and preparing the pan properly. Since the loaf pan is smaller than a traditional round pan, it allows the batter to rise beautifully while maintaining that luscious creamy center. Here’s how I make it, step by step, so you can achieve the same golden perfection every time.
Step 1: Prepare the oven and pan
Preheat your oven to 400°F (200°C). Line a 9×5-inch loaf pan with parchment paper, leaving enough overhang on all sides. The paper should rise above the edges of the pan by at least 2 inches. This will help contain the cheesecake as it puffs up during baking and make it easy to lift out later. Lightly press the parchment into the corners so it sits neatly inside.
Step 2: Soften the cream cheese
Make sure your cream cheese is fully softened before mixing. Place it in a large bowl and beat with a hand mixer or stand mixer on medium speed until completely smooth. Scrape down the sides of the bowl to ensure no lumps remain. This step is important because smooth cream cheese gives the cheesecake its signature creamy texture.
Step 3: Add the sugar and eggs
Add 3/4 cup granulated sugar to the bowl and mix until the mixture is light and creamy. Then, add the eggs one at a time, beating well after each addition. Mix just until combined—overbeating can add too much air, which might affect the texture. Scrape the sides of the bowl again to make sure everything blends evenly.
Step 4: Incorporate the cream and flavoring
Pour in 1 cup of heavy cream and 1/2 teaspoon vanilla extract. Mix until smooth. The batter will look silky and slightly pourable. If you’d like to add a personal touch, this is the moment to include a flavor variation such as a dash of lemon zest, a hint of espresso, or a drop of almond extract.
Step 5: Add the dry ingredients
Sift 1/4 cup of all-purpose flour and 1/4 teaspoon of salt directly into the mixture. Use a spatula to gently fold the dry ingredients into the batter. The goal is to maintain the smoothness while ensuring no streaks of flour remain.
Step 6: Pour and bake
Pour the cheesecake batter into the prepared loaf pan. Tap the pan gently on the counter to remove any air bubbles. Place it on the center rack of your preheated oven and bake for 45 to 55 minutes, depending on your oven. The cheesecake should be deeply golden brown on top, with a slightly burnt look, while the center remains a bit jiggly. This contrast is what creates the signature creamy interior and caramelized flavor.
Step 7: Cool and set
Once baked, remove the cheesecake from the oven and let it cool completely in the pan. The center will sink slightly as it cools, forming a beautiful rustic surface. After cooling, refrigerate the cheesecake for at least 4 hours, or preferably overnight. This resting period allows the flavors to develop and the texture to firm up to perfection.
Step 8: Slice and serve
When ready to serve, lift the cheesecake out using the parchment paper. Place it on a cutting board and slice it with a sharp knife, cleaning the blade between each cut. Serve chilled or at room temperature. Every bite will offer a creamy, rich center surrounded by a thin layer of caramelized edges.
Quick and Easy
One of the best things about this cheesecake is how simple it is to make. You don’t need a water bath, a crust, or special techniques. Everything mixes in one bowl, and the loaf pan makes baking even easier. It’s perfect for anyone who loves cheesecakes but wants a fuss-free recipe that still tastes incredible. The entire preparation takes only about 15 minutes before baking, and cleanup is minimal.
Customizable
This recipe is highly adaptable. You can make a smaller version using half the ingredients for a mini loaf pan, or double the recipe for a larger pan. To adjust sweetness, reduce the sugar slightly or add a tablespoon of honey for a softer flavor. For an added twist, swirl a bit of raspberry puree into the batter before baking for a fruity touch. Each variation keeps the essence of the Basque cheesecake—creamy, rustic, and irresistible.
Popular with Many People
Burnt Basque Cheesecake has become a global favorite for good reason. Its bold appearance, deep flavor, and melt-in-your-mouth texture appeal to both classic dessert lovers and modern bakers. Whenever I share this version baked in a loaf pan, it disappears fast. Its convenient size makes it perfect for small gatherings, family dinners, or even individual servings for café-style menus. Once you try it, it’s hard not to make it again and again.
Print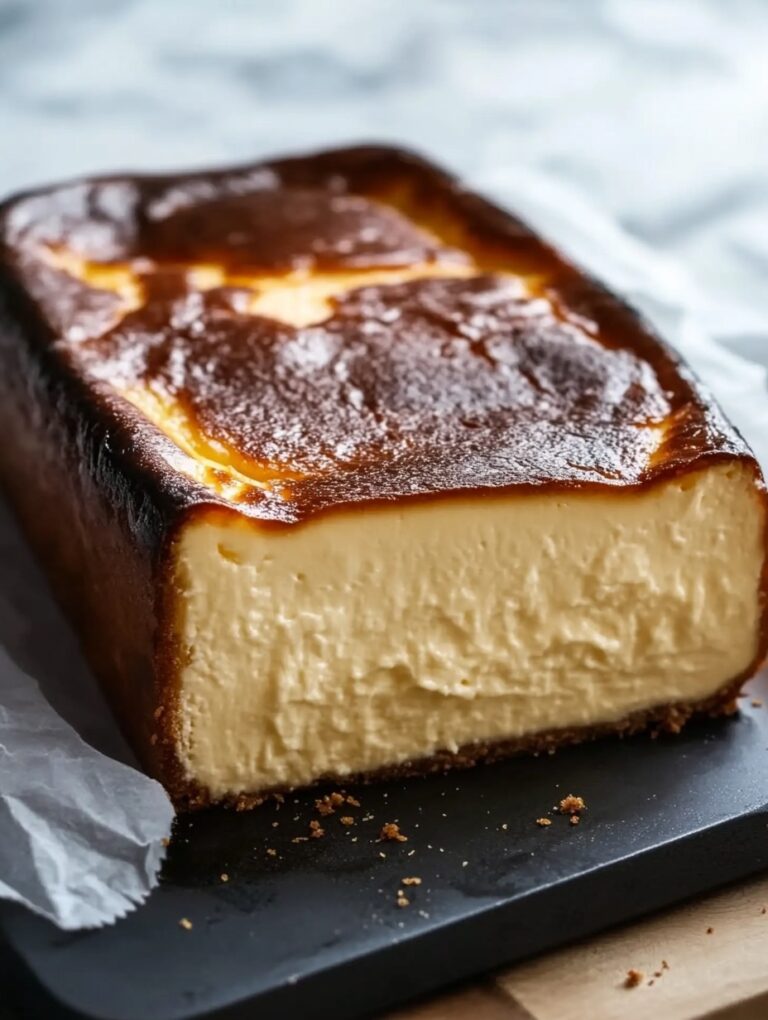
How To Make Burnt Basque Cheesecake in a Loaf Pan Recipe
This Burnt Basque Cheesecake in a loaf pan offers all the decadent creaminess of a traditional Basque cheesecake with a rustic, caramelized top and minimal fuss. Baked in a standard loaf pan, it’s perfect for small gatherings, family dinners, or an indulgent treat any day of the week. Its forgiving nature makes it ideal for beginner bakers while still impressing seasoned dessert lovers.
- Total Time: 1 hour 10 minutes
- Yield: 10 1x
Ingredients
- 16 oz (2 packages) cream cheese, softened
- 3/4 cup granulated sugar
- 3 large eggs
- 1 cup heavy cream
- 1/2 tsp vanilla extract
- 1/4 cup all-purpose flour
- 1/4 tsp salt
Instructions
- Preheat oven to 400°F (200°C). Line a 9×5-inch loaf pan with parchment paper, leaving a 2-inch overhang on all sides.
- In a large bowl, beat cream cheese until completely smooth. Scrape sides to remove lumps.
- Add sugar and beat until light and creamy.
- Add eggs one at a time, mixing until combined, scraping the bowl as needed.
- Pour in heavy cream and vanilla extract; mix until smooth. Optional: add lemon zest, espresso, or almond extract.
- Sift in flour and salt. Fold gently until no streaks remain.
- Pour batter into prepared loaf pan, tapping to remove air bubbles.
- Bake 45–55 minutes until top is deeply golden brown and center slightly jiggles.
- Cool completely at room temperature, then refrigerate at least 4 hours or overnight.
- Lift cheesecake out using parchment overhang, slice with a sharp knife, cleaning blade between cuts. Serve chilled or at room temperature.
Notes
The top should appear almost burnt; this contrasts with the creamy center.
Customize with flavor additions like citrus zest or espresso.
Loaf pan creates a thicker, more even rise than a round pan.
- Prep Time: 15
- Cook Time: 55
FAQs
Can I use a different type of pan?
Yes, you can use a similar-sized round or square pan, but the baking time may vary slightly. A loaf pan works best for a thick, creamy center with caramelized edges.
Do I need to grease the pan?
No need to grease if you line the pan with parchment paper. The parchment allows you to lift the cheesecake easily and prevents sticking.
Can I make this cheesecake ahead of time?
Absolutely. This cheesecake tastes even better the next day. Refrigerate for at least 4 hours or overnight before slicing to let the flavors develop and the texture set.
How do I know when it’s done?
The top should be deeply golden brown, almost burnt in spots. The center will still jiggle slightly when you gently shake the pan—this ensures a creamy, custardy texture.
Can I add flavors or toppings?
Yes. You can incorporate lemon zest, espresso, or almond extract into the batter. Top with fresh berries, powdered sugar, or a light caramel drizzle.
How should I store leftovers?
Wrap tightly with plastic wrap or store in an airtight container in the refrigerator for up to 5 days. For longer storage, slices can be frozen and thawed before serving.