

Ever since I discovered the magic of combining two beloved desserts into one, I’ve been obsessed with creating unique treats that surprise and delight. The Red Velvet Cheesecake Sushi Roll is one of those creations that immediately became a favorite in my kitchen. From the moment I first rolled velvety red cake with creamy cheesecake filling, I knew I had stumbled upon a dessert that would wow anyone lucky enough to try it. Each slice is a perfect balance of rich flavor, moist texture, and stunning presentation, making it a showstopper for special occasions or even a fun weekend treat at home.
You will love this recipe because it merges the indulgent flavors of red velvet cake with the silky smoothness of cheesecake, all in a fun, rollable format. It’s a dessert that feels luxurious but is surprisingly easy to make, perfect for both beginners and seasoned bakers. The combination of sweet cream cheese and tender cake creates a harmony that keeps everyone coming back for more.
This recipe is incredibly versatile. You can serve it as a dessert for parties, slice it for afternoon tea, or even enjoy it as a sweet breakfast treat. Its vibrant red interior makes it ideal for festive occasions like Valentine’s Day, anniversaries, or birthdays. Plus, it can be adapted with different toppings, such as crushed nuts, fruit, or a drizzle of chocolate, to suit your preferences.
Despite its elegant appearance, this dessert is also affordable. Most ingredients are pantry staples or easily sourced at your local grocery store. You won’t need any fancy equipment, just a baking sheet, parchment paper, and a rolling mat to achieve the perfect sushi roll look.
Ingredients for the Red Velvet Cheesecake Sushi Roll:
-
1 cup all-purpose flour
-
1/2 cup unsweetened cocoa powder
-
1 teaspoon baking powder
-
1/2 teaspoon baking soda
-
1/4 teaspoon salt
-
3/4 cup granulated sugar
-
1/2 cup vegetable oil
-
2 large eggs
-
1 teaspoon vanilla extract
-
1/2 cup buttermilk
-
Red food coloring, as needed
-
8 oz cream cheese, softened
-
1/4 cup powdered sugar
-
1 teaspoon vanilla extract
-
1/2 cup heavy cream
-
Optional toppings: sliced strawberries, crushed nuts, or chocolate drizzle
This dessert promises an unforgettable experience, whether you’re preparing it for family, friends, or simply indulging yourself. Its combination of flavors, textures, and colors will not only satisfy your sweet tooth but also make your kitchen smell heavenly.
How to Prepare the Red Velvet Cheesecake Sushi Roll
Preparing the Red Velvet Cheesecake Sushi Roll is easier than it looks, and following each step carefully ensures a flawless, stunning dessert. This recipe is quick and easy, yet it impresses with its vibrant colors and rich flavors. You can also customize it to match your taste preferences or occasion, making it popular with many people.
Step-by-Step Instructions
1. Preheat and prepare the pan
Start by preheating your oven to 350°F (175°C). Line a 10×15-inch jelly roll pan with parchment paper. Lightly grease the parchment to prevent the cake from sticking. This step is crucial to achieve a smooth, rollable cake later.
2. Mix dry ingredients
In a medium bowl, sift together 1 cup all-purpose flour, 1/2 cup unsweetened cocoa powder, 1 teaspoon baking powder, 1/2 teaspoon baking soda, and 1/4 teaspoon salt. Using a whisk, combine thoroughly to ensure the cocoa and leavening agents are evenly distributed.
3. Combine wet ingredients
In a large bowl, whisk 3/4 cup granulated sugar with 1/2 cup vegetable oil until smooth. Add 2 large eggs, one at a time, mixing well after each addition. Stir in 1 teaspoon vanilla extract. Gradually mix in 1/2 cup buttermilk until fully incorporated. Then, add red food coloring gradually until you achieve a vibrant red hue.
4. Combine wet and dry ingredients
Gently fold the dry ingredients into the wet mixture using a spatula. Make sure to fold carefully to avoid deflating the batter while ensuring all flour is incorporated. The batter should be smooth and thick but still pourable.
5. Bake the cake
Pour the batter evenly into the prepared pan. Smooth the top with a spatula for an even surface. Bake for 12–15 minutes, or until a toothpick inserted in the center comes out clean. Be careful not to overbake, as you want a soft, flexible cake that can be rolled without cracking.
6. Prepare the cream cheese filling
While the cake bakes, prepare the filling. In a medium bowl, beat 8 oz softened cream cheese with 1/4 cup powdered sugar and 1 teaspoon vanilla extract until smooth. In a separate bowl, whip 1/2 cup heavy cream to soft peaks. Gently fold the whipped cream into the cream cheese mixture until fully combined and fluffy.
7. Roll the cake
Once baked, allow the cake to cool for 5 minutes. Carefully invert the cake onto a clean kitchen towel sprinkled with powdered sugar. Peel off the parchment paper. Starting from one short end, gently roll the cake with the towel inside to form a tight spiral. Let it cool completely in this rolled position.
8. Assemble the sushi roll
After the cake has cooled, unroll it carefully. Spread the cream cheese filling evenly over the surface. Avoid overfilling, which can make rolling difficult. Gently re-roll the cake, this time without the towel, ensuring a tight, even spiral.
9. Chill the roll
Wrap the roll tightly in plastic wrap and refrigerate for at least 1–2 hours. Chilling helps the roll set, making it easier to slice cleanly.
10. Slice and serve
Once chilled, unwrap the roll and cut into 1-inch slices using a sharp knife. Clean the knife between cuts for neat slices. Arrange on a serving plate and optionally add toppings like sliced strawberries, crushed nuts, or a light drizzle of chocolate.
This Red Velvet Cheesecake Sushi Roll is quick to prepare and adaptable. You can customize the filling with flavored cream cheeses or add fruit layers. Its soft, moist texture combined with the creamy filling makes it a crowd favorite at parties, family gatherings, or even as a decadent everyday treat.
Print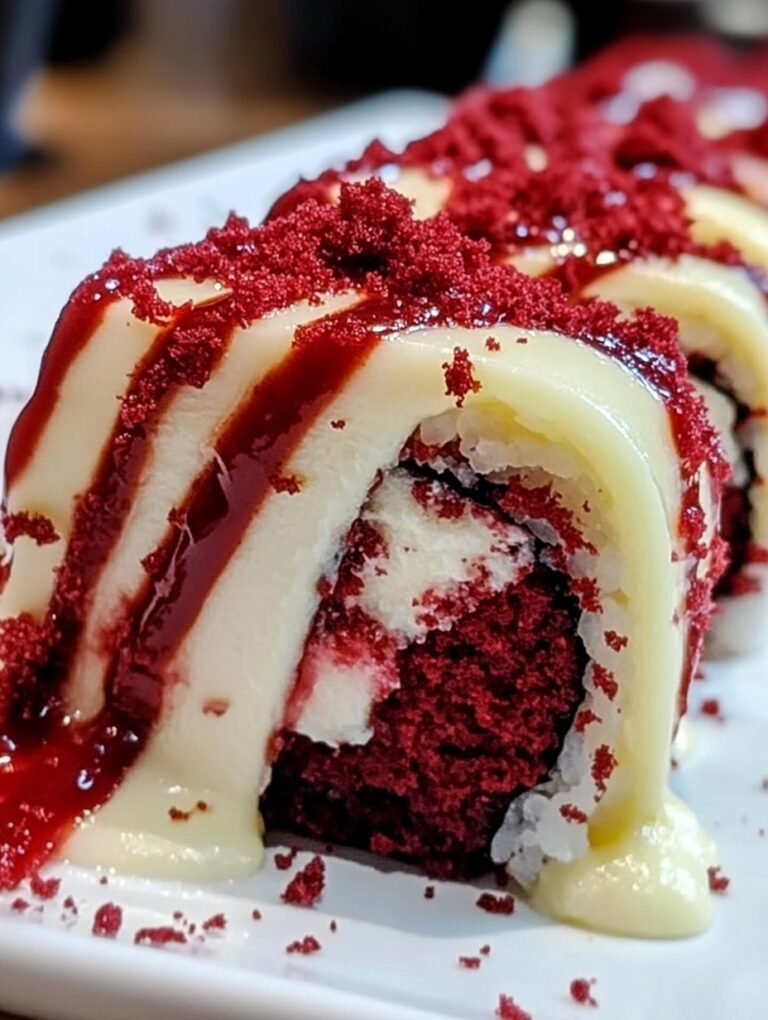
Red Velvet Cheesecake Sushi Roll Dessert
The Red Velvet Cheesecake Sushi Roll is a stunning dessert that combines the rich flavors of red velvet cake with creamy, smooth cheesecake. Its spiral design makes it visually appealing and perfect for special occasions, while its soft texture and sweet filling delight every palate. This dessert is versatile, easy to customize, and ideal for both casual treats and festive celebrations.
- Total Time: 40 minutes
- Yield: 12 1x
Ingredients
- 1 cup all-purpose flour
- 1/2 cup unsweetened cocoa powder
- 1 teaspoon baking powder
- 1/2 teaspoon baking soda
- 1/4 teaspoon salt
- 3/4 cup granulated sugar
- 1/2 cup vegetable oil
- 2 large eggs
- 1 teaspoon vanilla extract
- 1/2 cup buttermilk
- Red food coloring, as needed
- 8 oz cream cheese, softened
- 1/4 cup powdered sugar
- 1 teaspoon vanilla extract
- 1/2 cup heavy cream
- Optional toppings: sliced strawberries, crushed nuts, chocolate drizzle
Instructions
- Preheat oven to 350°F (175°C) and line a 10×15-inch jelly roll pan with parchment paper. Lightly grease the paper.
- In a medium bowl, sift together flour, cocoa powder, baking powder, baking soda, and salt. Mix thoroughly.
- In a large bowl, whisk sugar with vegetable oil. Add eggs one at a time, mixing well. Stir in vanilla and buttermilk, then add red food coloring to achieve desired shade.
- Fold dry ingredients into wet mixture gently until smooth. Pour batter into prepared pan and smooth the top.
- Bake 12–15 minutes or until a toothpick comes out clean. Allow to cool 5 minutes.
- While cake bakes, beat cream cheese with powdered sugar and vanilla until smooth. Whip heavy cream to soft peaks and fold into cream cheese mixture.
- Invert cake onto a powdered sugar–sprinkled towel, peel parchment, and roll cake with towel inside. Cool completely in rolled position.
- Unroll cake, spread filling evenly, and re-roll without towel. Wrap in plastic and refrigerate 1–2 hours.
- Slice into 1-inch pieces and add optional toppings.
Notes
Use a sharp knife to achieve clean slices.
Roll cake while slightly warm to prevent cracks.
Customize filling with fruit or flavored extracts.
- Prep Time: 25
- Cook Time: 15
FAQs
Q: Can I make the Red Velvet Cheesecake Sushi Roll ahead of time?
A: Yes, you can prepare the roll a day in advance. After assembling, wrap it tightly in plastic wrap and refrigerate. This helps the flavors meld, and the roll will slice neatly the next day.
Q: Can I freeze the sushi roll?
A: Absolutely. Wrap the roll tightly in plastic wrap and then in aluminum foil before freezing. Thaw in the refrigerator for several hours or overnight before slicing and serving.
Q: Can I use a different type of cake?
A: Yes, this recipe is versatile. You can substitute with chocolate, vanilla, or even a sponge cake, but make sure it’s soft and pliable enough to roll without cracking.
Q: How do I prevent the cake from cracking when rolling?
A: Roll the cake while it’s slightly warm and use a kitchen towel to guide it. Allow it to cool in the rolled position before unrolling and adding the filling. This helps maintain its shape.
Q: Can I adjust the filling?
A: Definitely. You can add fruit puree, chocolate chips, or flavored extracts to the cream cheese filling for a personalized twist.
Q: Is this recipe suitable for parties?
A: Yes, its vibrant red color and elegant spiral make it perfect for celebrations, holidays, or casual gatherings.