
I’ve always had a soft spot for waffles, and these Red Velvet Marble Waffles hold a special place in my heart. The first time I made them, it was for a cozy Sunday brunch with friends. I wanted something that looked elegant yet comforting, something that blended the charm of red velvet cake with the crisp, buttery perfection of a classic waffle. The result was absolutely delightful — a beautiful swirl of red and vanilla batters that cooked into fluffy, golden perfection with a touch of cocoa aroma. Every bite felt like a celebration, especially when topped with a dollop of whipped cream or a drizzle of cream cheese glaze.
What makes this recipe truly lovable is its combination of taste, texture, and presentation. The red velvet swirl adds a stunning visual contrast that instantly elevates any breakfast table. These waffles are crisp on the outside, soft and airy inside, and carry that subtle cocoa flavor that red velvet lovers adore. They’re not just pretty — they’re indulgent, balanced, and satisfying without being overly sweet.
You’ll love this recipe for many reasons. First, it’s incredibly versatile. These waffles can be served for breakfast, brunch, or even as a dessert. Pair them with fruits, cream cheese frosting, or a drizzle of maple syrup, and you’ve got a treat that suits any occasion. Second, it’s a crowd-pleaser — kids are enchanted by the colors, and adults appreciate the hint of cocoa and the light texture. You can even prepare the batter the night before, making your morning meal effortless and fun.
Another thing I appreciate about this recipe is how affordable it is. It uses basic pantry staples like flour, eggs, sugar, and cocoa powder, so you won’t need anything fancy. The red food coloring gives that signature hue, and a touch of vanilla brings out the comforting aroma. Whether you’re hosting brunch or just treating yourself, this recipe delivers both elegance and flavor on a budget.
Ingredients for Red Velvet Marble Waffles:
-
2 cups all-purpose flour
-
2 tablespoons unsweetened cocoa powder
-
2 tablespoons granulated sugar
-
1 tablespoon baking powder
-
½ teaspoon salt
-
2 large eggs
-
1¾ cups milk (or buttermilk for extra richness)
-
½ cup melted butter
-
1 teaspoon vanilla extract
-
1 tablespoon red food coloring
-
Optional toppings: whipped cream, cream cheese glaze, maple syrup, or fresh berries
How to Prepare This Recipe
Preparing these Red Velvet Marble Waffles is a delightful process that combines creativity with simplicity. The result is a plate of waffles that not only tastes incredible but also looks like a work of art. Let’s go through the process together step by step so you can achieve that perfect balance of color, texture, and flavor every time.
How to Prepare Red Velvet Marble Waffles
Step 1: Gather and Prepare the Ingredients
Before starting, measure and set out all your ingredients. Having everything ready will make the process quicker and smoother. You’ll need two mixing bowls, a whisk, a spatula, and your waffle maker. Preheat your waffle iron while you prepare the batter so it’s ready to go once the mixture is complete. Lightly grease the plates with melted butter or a bit of oil to prevent sticking.
Step 2: Mix the Dry Ingredients
In a large bowl, whisk together the flour, cocoa powder, sugar, baking powder, and salt. This step ensures all the dry ingredients are evenly distributed and eliminates any lumps. Mixing them thoroughly at this stage will give your waffles a uniform texture.
Step 3: Prepare the Wet Ingredients
In another bowl, whisk together the eggs, milk (or buttermilk), melted butter, and vanilla extract. Whisk until the mixture is smooth and creamy. The buttermilk will add a slight tang and extra fluffiness, but regular milk works perfectly well if you prefer a milder flavor.
Step 4: Combine Wet and Dry Ingredients
Gradually pour the wet mixture into the dry ingredients while whisking gently. Mix until just combined. Be careful not to overmix — a few small lumps are perfectly fine and will keep your waffles tender. Overmixing can lead to dense or chewy waffles instead of light and fluffy ones.
Step 5: Divide the Batter and Add Color
Once your batter is ready, divide it into two equal portions. In one bowl, stir in the red food coloring until the color is evenly distributed and vibrant. The second bowl will remain as your classic vanilla batter. These two batters will create the signature marble effect that makes this recipe special.
Step 6: Create the Marble Effect
To form the marble pattern, spoon a small amount of the red batter and a small amount of the plain batter alternately into the preheated waffle iron. Use a skewer or the tip of a knife to lightly swirl the batters together before closing the lid. Don’t over-swirl, or the colors will blend completely — a few gentle twists are enough to create a beautiful marbled design.
Step 7: Cook Until Golden and Crisp
Close the waffle iron and cook according to the manufacturer’s instructions. Typically, waffles take about 3–5 minutes to cook, depending on your iron. The waffles should be crisp on the outside and soft inside with a lovely red and cream swirl when done. Carefully remove each waffle with a fork or tongs and place it on a wire rack to keep it crisp while you cook the remaining batter.
Step 8: Serve and Enjoy
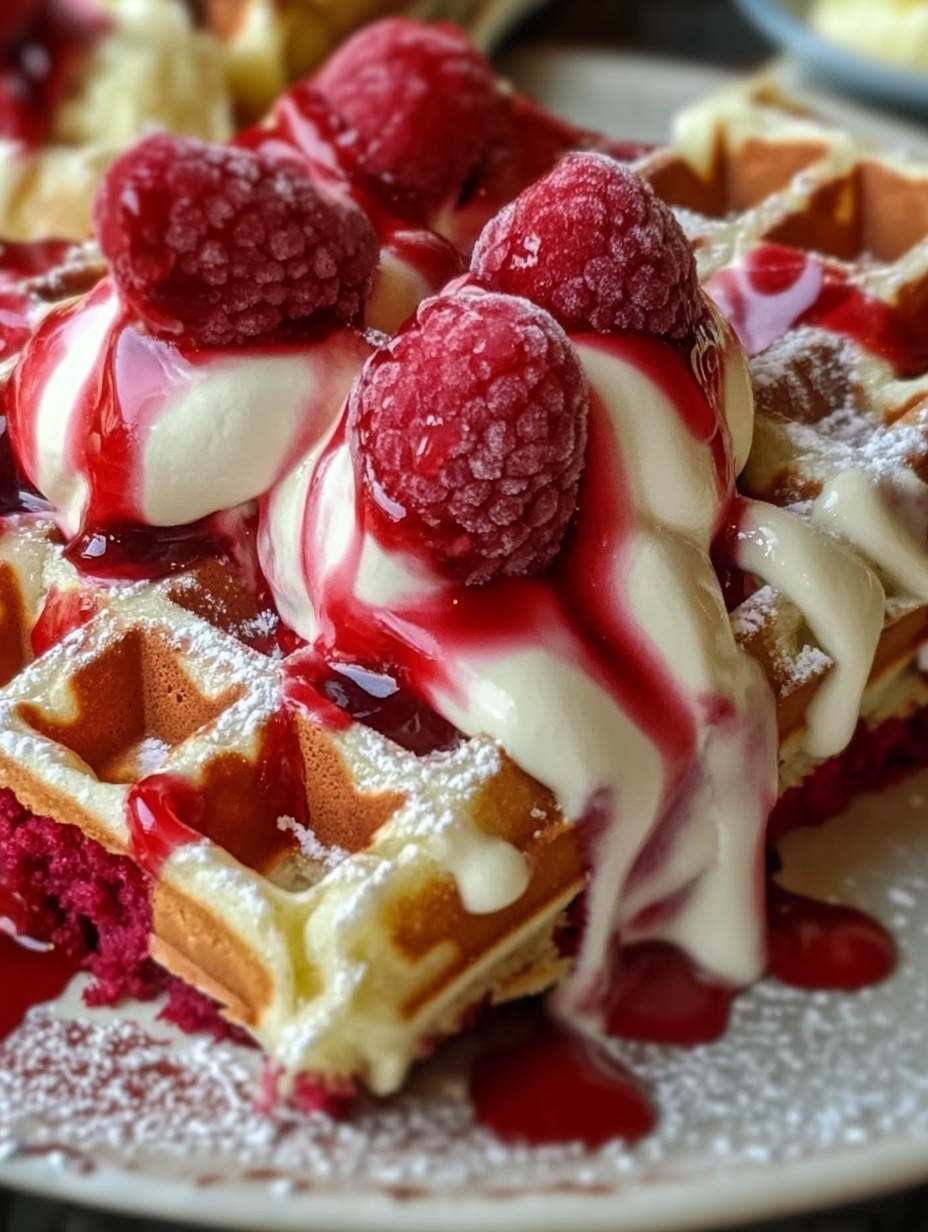
Serve your Red Velvet Marble Waffles warm. You can top them with a dollop of whipped cream, drizzle them with cream cheese glaze, or keep it simple with maple syrup. Fresh strawberries, raspberries, or blueberries also make excellent toppings that add freshness and color. For a dessert version, a scoop of vanilla ice cream is a perfect match.
Quick and Easy to Make
These waffles may look fancy, but they’re surprisingly quick to prepare. The batter comes together in less than ten minutes, and cooking each batch takes only a few minutes. You can even prepare the dry and wet ingredients separately the night before and combine them in the morning for a stress-free breakfast.
Customizable to Your Taste
The best part about this recipe is how adaptable it is. You can adjust the cocoa level for a stronger or milder chocolate flavor or swap the food coloring for natural alternatives like beet powder. If you’re feeling creative, try adding chocolate chips or a hint of cinnamon for an extra twist. For a healthier version, use whole wheat flour or reduce the butter slightly.
Loved by Many
These waffles are always a hit with family and friends. Their color makes them perfect for special occasions such as Valentine’s Day, birthdays, or weekend brunches. The mix of red velvet richness and fluffy waffle texture wins everyone over — and the marble pattern never fails to impress. Whether you serve them for a crowd or enjoy them alone with a cup of coffee, they always bring warmth and joy to the table.
Print
Red Velvet Marble Waffles: A Delightful Breakfast Treat
These Red Velvet Marble Waffles are a perfect blend of elegance and comfort. Crispy on the outside, soft and fluffy inside, with a beautiful red and vanilla swirl, they are ideal for breakfast, brunch, or a dessert treat. Quick to make, customizable, and visually stunning, they are sure to impress family and friends.
- Total Time: 15 minutes
- Yield: 8 1x
Ingredients
- 2 cups all-purpose flour
- 2 tablespoons unsweetened cocoa powder
- 2 tablespoons granulated sugar
- 1 tablespoon baking powder
- ½ teaspoon salt
- 2 large eggs
- 1¾ cups milk (or buttermilk)
- ½ cup melted butter
- 1 teaspoon vanilla extract
- 1 tablespoon red food coloring
- Optional toppings: whipped cream, cream cheese glaze, maple syrup, fresh berries
Instructions
- Preheat your waffle iron and lightly grease with melted butter or oil.
- In a large bowl, whisk together flour, cocoa powder, sugar, baking powder, and salt.
- In a separate bowl, whisk eggs, milk, melted butter, and vanilla extract until smooth.
- Gradually pour wet ingredients into dry ingredients, mixing gently until just combined.
- Divide batter into two portions; add red food coloring to one portion.
- Spoon alternating portions of red and vanilla batter into the waffle iron.
- Swirl gently with a skewer to create a marble effect.
- Close the waffle iron and cook for 3–5 minutes, or until golden and crisp.
- Remove waffles carefully and place on a wire rack to retain crispness.
- Serve warm with desired toppings.
Notes
Do not overmix the batter to keep waffles light and fluffy.
Adjust cocoa or food coloring to preference.
Waffles can be stored in the refrigerator or freezer for later use.
- Prep Time: 10
- Cook Time: 5
FAQs
Q1: Can I make the batter ahead of time?
Yes, you can prepare the batter the night before. Store it in an airtight container in the refrigerator. Give it a gentle stir before using, as it may thicken slightly overnight.
Q2: Can I use a different type of milk?
Absolutely. You can substitute regular milk with almond, oat, or soy milk. Buttermilk is preferred for extra fluffiness and a slight tang, but any milk works.
Q3: How do I achieve the perfect marble effect?
Spoon the red and vanilla batters alternately into the waffle iron and gently swirl with a skewer or knife. Avoid over-swelling, or the colors will blend too much.
Q4: Can I make these waffles gluten-free?
Yes. Replace the all-purpose flour with a gluten-free flour blend suitable for baking. You may need to adjust the liquid slightly for the right consistency.
Q5: How should I store leftovers?
Cool the waffles completely, then store them in an airtight container in the refrigerator for up to 3 days. Reheat in a toaster or oven for best results.
Q6: Can I freeze the waffles?
Definitely. Freeze cooled waffles in a single layer on a baking sheet, then transfer to a freezer-safe bag for up to 2 months. Toast or bake directly from frozen for a crisp finish.