

I still remember the first time I made these Cotton Candy Cookies. The scent of sweet vanilla and that unmistakable candy-shop aroma filled my kitchen, instantly taking me back to childhood fairs and summer carnivals. There’s something so whimsical and fun about cotton candy – and transforming it into a soft, chewy cookie? That’s the kind of playful creativity that makes baking truly joyful.
These cookies aren’t just a treat; they’re a conversation starter. Every time I serve them, whether at a birthday party or just as an after-school surprise, they vanish within minutes. People are always intrigued by the look and flavor. They’re colorful, yes, but the flavor – soft notes of vanilla and cotton candy – is what really wins people over. It’s like nostalgia in cookie form.
Why You Will Love This Recipe
You’ll love these Cotton Candy Cookies for so many reasons. First, they are super soft and chewy, which makes every bite feel like it’s melting in your mouth. The flavor is subtle yet delicious, a perfect balance of sweetness without being overpowering.
If you enjoy baking with your kids, this is one of those recipes that is fun for the whole family. Rolling the dough into colorful balls, watching them bake into perfectly round, marbled cookies – it’s interactive and rewarding. And best of all, they look like they came straight out of a candy shop.
Versatile
These cookies are also incredibly versatile. You can adjust the color theme to match any holiday or celebration – think pastel blues and pinks for baby showers, red and green for the holidays, or bold primaries for a circus-themed birthday. You can even turn them into ice cream sandwiches or cookie pops with just a few tweaks.
Affordable
Baking a batch won’t cost you much either. All of the ingredients are affordable and easy to find, and you likely already have most of them in your pantry. A few drops of cotton candy flavoring and food coloring are all it takes to create that magical twist.
Ingredients for the Recipe
-
All-purpose flour
-
Baking powder
-
Baking soda
-
Salt
-
Unsalted butter
-
Granulated sugar
-
Eggs
-
Vanilla extract
-
Cotton candy flavoring
-
Blue and pink gel food coloring
Once you gather these simple ingredients, you’re just a few steps away from a cookie that’s as fun to make as it is to eat.
How to Prepare This Recipe
Making Cotton Candy Cookies is an enjoyable process, perfect for both beginner and experienced bakers. It’s straightforward, quick, and allows for creativity in both color and presentation. These cookies come together in under an hour and bring fun and flavor in every bite.
Step-by-Step Instructions for Preparation
1. Prepare Your Ingredients
Begin by measuring all your ingredients. This will make the process smoother and help ensure accuracy. Let your butter come to room temperature beforehand for better creaming results.
2. Mix Dry Ingredients
In a medium bowl, whisk together:
-
2 ½ cups all-purpose flour
-
½ teaspoon baking powder
-
½ teaspoon baking soda
-
¼ teaspoon salt
Set this mixture aside.
3. Cream the Butter and Sugar
In a large mixing bowl, beat:
-
1 cup (2 sticks) unsalted butter (softened)
-
1 ¼ cups granulated sugar
Use an electric mixer on medium speed for 2–3 minutes, or until the mixture becomes light and fluffy. This step is important to create a soft cookie texture.
4. Add Wet Ingredients
To the creamed butter and sugar, add:
-
2 large eggs (one at a time)
-
1 teaspoon vanilla extract
-
1 ½ teaspoons cotton candy flavoring
Mix until well combined. Scrape down the sides of the bowl to incorporate all ingredients.
5. Combine Wet and Dry
Slowly add the dry mixture to the wet mixture. Mix on low speed just until the dough comes together. Do not overmix, as this can lead to tough cookies.
6. Divide and Color the Dough
Divide the dough evenly into two separate bowls. In one bowl, add a few drops of pink gel food coloring. In the other, add blue gel food coloring. Mix each until the color is fully incorporated. You can adjust the intensity of the color to your liking.
7. Form the Dough Balls
Take a small piece from each colored dough and gently roll them together into one cookie dough ball. This will give a beautiful marbled effect. Repeat until all dough is used.
8. Chill the Dough (Optional but Recommended)
Place the dough balls on a baking sheet and refrigerate for 20–30 minutes. This helps them hold their shape during baking and enhances the chewy texture.
9. Bake
Preheat your oven to 175°C (350°F). Line baking sheets with parchment paper. Place the chilled cookie dough balls about 2 inches apart. Bake for 10–12 minutes, or until the edges are set but the centers still look slightly soft.
10. Cool
Allow the cookies to cool on the baking sheet for 5 minutes before transferring them to a wire rack to cool completely. They will continue to firm up as they cool.
Quick and Easy
This recipe is quick and easy from start to finish. With just 10–12 minutes of baking time and minimal prep, these cookies can be whipped up in under an hour. You can even make the dough ahead of time and bake fresh batches whenever needed. It’s a fantastic recipe when you want something special without spending hours in the kitchen.
Customizable
You can customize these cookies in many ways. Want extra sweetness? Add white chocolate chips. Want to switch up the flavor? Try strawberry or vanilla flavoring instead of cotton candy. You can also roll the dough balls in sanding sugar for a sparkly finish, or flatten them slightly before baking for thinner, crispier cookies.
Popular with Many People
These cookies are a crowd favorite at kids’ parties, baby showers, school events, and bake sales. Their bright color and nostalgic flavor make them universally appealing. Even adults who usually avoid sweets find themselves smiling after one bite.
They store well in an airtight container for up to 5 days at room temperature, and they freeze beautifully too. Whether you’re gifting them, serving them at an event, or enjoying them with coffee, they always bring joy.
Print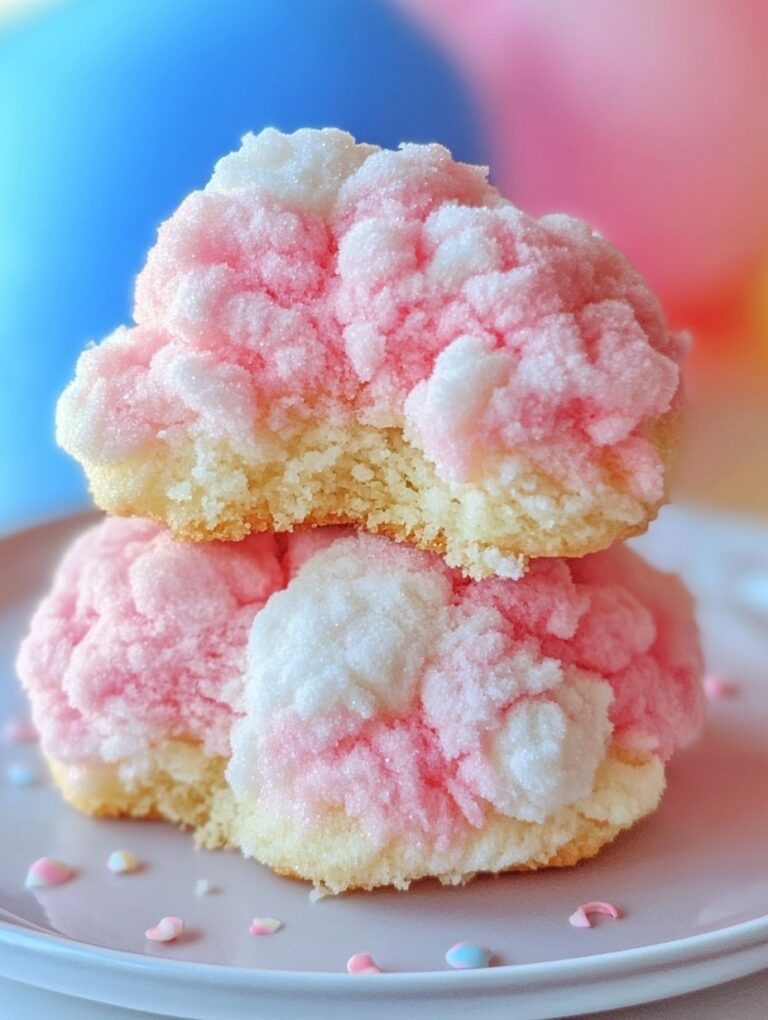
Cotton Candy Cookies
These Cotton Candy Cookies are soft, chewy, and visually fun treats that bring the nostalgic flavor of cotton candy to your kitchen. Perfect for celebrations or everyday treats, their light vanilla-cotton candy flavor and pastel marbled colors make them a unique addition to your baking repertoire.
- Total Time: 32 minutes
- Yield: 24 1x
Ingredients
- 2 ½ cups all-purpose flour
- ½ teaspoon baking powder
- ½ teaspoon baking soda
- ¼ teaspoon salt
- 1 cup (2 sticks) unsalted butter, softened
- 1 ¼ cups granulated sugar
- 2 large eggs
- 1 teaspoon vanilla extract
- 1 ½ teaspoons cotton candy flavoring
- Blue gel food coloring
- Pink gel food coloring
Instructions
- Preheat oven to 175°C (350°F). Line baking sheets with parchment paper.
- In a medium bowl, whisk flour, baking powder, baking soda, and salt. Set aside.
- In a large bowl, beat butter and sugar until light and fluffy, about 2–3 minutes.
- Add eggs one at a time, mixing well after each addition. Stir in vanilla and cotton candy flavoring.
- Gradually add dry ingredients, mixing on low speed just until combined.
- Divide dough into two bowls. Color one pink, the other blue with gel food coloring.
- Take small pieces from each color and roll together into marbled dough balls.
- Place dough balls on baking sheets 2 inches apart. Chill 20–30 minutes (optional).
- Bake 10–12 minutes until edges set but centers remain soft.
- Cool on baking sheet 5 minutes, then transfer to wire rack to cool completely.
Notes
Chilling dough improves shape and texture but is optional.
Gel food coloring works best for vibrant colors.
Customize by adding white chocolate chips or rolling in sanding sugar before baking.
- Prep Time: 20
- Cook Time: 12
FAQs
Can I make these cookies without cotton candy flavoring?
Yes, you can. While cotton candy flavoring gives them their signature taste, you can substitute it with vanilla or strawberry extract for a different but still delicious twist.
Can I use liquid food coloring instead of gel?
Gel food coloring is preferred because it gives vibrant colors without changing the dough’s consistency. If using liquid food coloring, add it sparingly and be cautious not to over-moisten the dough.
Do I have to chill the dough?
Chilling is optional, but recommended. It helps the cookies hold their shape better and improves texture. If you’re short on time, you can bake them immediately, though they may spread slightly more.
Can these cookies be frozen?
Absolutely. You can freeze both the dough and the baked cookies. Freeze dough balls on a tray, then transfer to a sealed container. Baked cookies can be frozen once cooled and stored in airtight bags for up to 2 months.
Are these cookies overly sweet?
Not at all. Despite their bright colors and fun name, the sweetness is balanced and subtle. The cotton candy flavor is light and never overpowering.