
When I think about comfort food, my mind often drifts to the nostalgic pairing of peanut butter and jelly. Growing up, this combination was a staple in my kitchen, tucked inside school sandwiches or enjoyed as a quick snack on busy afternoons. Over the years, I began to wonder how I could take those same familiar flavors and transform them into something more indulgent, more elegant, and more worthy of a special occasion. That’s how this Peanut Butter and Jelly Cheesecake was born—a dessert that combines the childhood joy of PB&J with the sophistication of a creamy, velvety cheesecake.
This recipe has quickly become one of my favorites to share at gatherings, partly because it always sparks a sense of nostalgia. Guests recognize the flavors immediately, yet they are surprised by how beautifully they come together in a rich, smooth cheesecake base. The nutty depth of peanut butter complements the fruity brightness of jelly, creating a perfect balance of savory and sweet. With every bite, you get a harmonious blend of comfort and indulgence.
Why You Will Love This Recipe
You’ll love this Peanut Butter and Jelly Cheesecake because it’s a true crowd-pleaser. It feels playful yet refined, making it just as suitable for a casual family get-together as it is for a dinner party. Unlike many desserts that rely on overly complex ingredients, this one uses simple pantry staples that you probably already have at home.
The recipe is also wonderfully approachable. Even if you’re not an experienced baker, you’ll find that the steps are easy to follow. The base requires minimal effort, the filling comes together quickly, and the jelly topping is both decorative and delicious. Plus, it’s a dessert that invites creativity—you can experiment with different flavors of jelly or try crunchy peanut butter for added texture.
Versatile
One of the best things about this cheesecake is its versatility. While I typically prepare it with strawberry or raspberry jelly, you can switch it up to match your taste. Grape jelly adds a classic PB&J vibe, while apricot or blueberry can give it a gourmet twist. You can also serve it plain for a clean look or swirl the jelly into the top for a marbled effect. Whether you’re baking it for kids, adults, or a mixed crowd, it adapts beautifully.
Affordable
Another reason this recipe is so special is its affordability. Cheesecake often carries the reputation of being an expensive dessert, but this version proves otherwise. With cream cheese, peanut butter, sugar, eggs, and jelly as the main components, the cost stays reasonable while still delivering an indulgent result. Most of the ingredients are already pantry staples, so you won’t need to splurge on fancy extras.
Ingredients for the Recipe
-
Cream cheese
-
Peanut butter (smooth or crunchy)
-
Sugar
-
Eggs
-
Vanilla extract
-
Graham crackers (or digestive biscuits)
-
Butter
-
Jelly or jam (your choice of flavor)
How to Prepare Peanut Butter and Jelly Cheesecake
Making this Peanut Butter and Jelly Cheesecake is a rewarding process, and it’s easier than it looks. By following each step carefully, you’ll end up with a smooth, creamy cheesecake that holds together beautifully while highlighting those nostalgic peanut butter and jelly flavors.
Step-by-Step Instructions for Preparation
Step 1: Prepare the Crust
Start by crushing your graham crackers (or digestive biscuits) until they form fine crumbs. Place the crumbs into a bowl and add melted butter, mixing until everything is well coated. The mixture should resemble wet sand and hold together when pressed. Transfer this into a springform pan and press it down firmly to create an even base. Use the bottom of a glass to smooth it out. Place the pan in the refrigerator to chill while you prepare the filling.
Step 2: Mix the Cheesecake Filling
In a large mixing bowl, beat the cream cheese until smooth and free of lumps. Add sugar and continue mixing until well incorporated. Next, add peanut butter, blending until creamy and fully combined. Beat in the eggs, one at a time, ensuring each is fully mixed before adding the next. Stir in vanilla extract to round out the flavor. The mixture should be silky and slightly thick at this stage.
Step 3: Bake the Cheesecake Base
Preheat your oven to 325°F (160°C). Pour the filling over the chilled crust and spread it evenly with a spatula. Tap the pan gently on the counter to remove any air bubbles. Place the cheesecake into the oven and bake for 50 to 55 minutes. The center should be slightly set but still have a gentle wobble when shaken. Turn off the oven, crack the door open, and allow the cheesecake to rest inside for one hour. This slow cooling helps prevent cracks.
Step 4: Chill the Cheesecake
After resting, transfer the cheesecake to the refrigerator. Allow it to chill for at least 4 hours, preferably overnight. Chilling not only helps the cheesecake set properly but also enhances the flavors, allowing the peanut butter to mellow and the cream cheese to shine.
Step 5: Add the Jelly Topping
Once chilled, spread a generous layer of your chosen jelly or jam over the top of the cheesecake. Strawberry, raspberry, or grape work wonderfully, but you can experiment with other flavors. Smooth the jelly evenly with a spatula, or leave a rustic finish for a homemade touch. If you’d like a swirled effect, drop small spoonfuls of jelly on top before baking, then swirl them gently into the filling with a skewer.
Step 6: Slice and Serve
To serve, run a knife under warm water before slicing for neat, clean edges. Each slice will showcase a creamy peanut butter filling balanced by a glossy jelly topping, making it as beautiful as it is delicious.
Quick and Easy
Although cheesecake often intimidates home bakers, this recipe proves that it doesn’t have to be complicated. With simple steps—pressing a crust, mixing a filling, baking, chilling, and topping—you’ll have a dessert that feels gourmet with minimal stress. The ingredients are everyday items, and the method is straightforward enough for both beginners and seasoned bakers.
Customizable
This cheesecake is highly customizable. If you prefer more crunch, use crunchy peanut butter instead of smooth. For an extra nutty touch, sprinkle crushed peanuts over the jelly topping before serving. You can also change the crust by using chocolate cookies for a richer flavor or shortbread for a lighter one. Jelly flavors can be swapped depending on the season or personal preference, giving you countless variations to enjoy.
Popular with Many People
This Peanut Butter and Jelly Cheesecake resonates with almost everyone who tries it. The flavors are universally loved, bridging generations with their nostalgic appeal. Children love the familiarity, while adults appreciate the sophisticated twist on a childhood classic. Whether served at a birthday, holiday, or casual dinner, it’s guaranteed to draw compliments and requests for seconds.
Print
Peanut Butter And Jelly Cheesecake
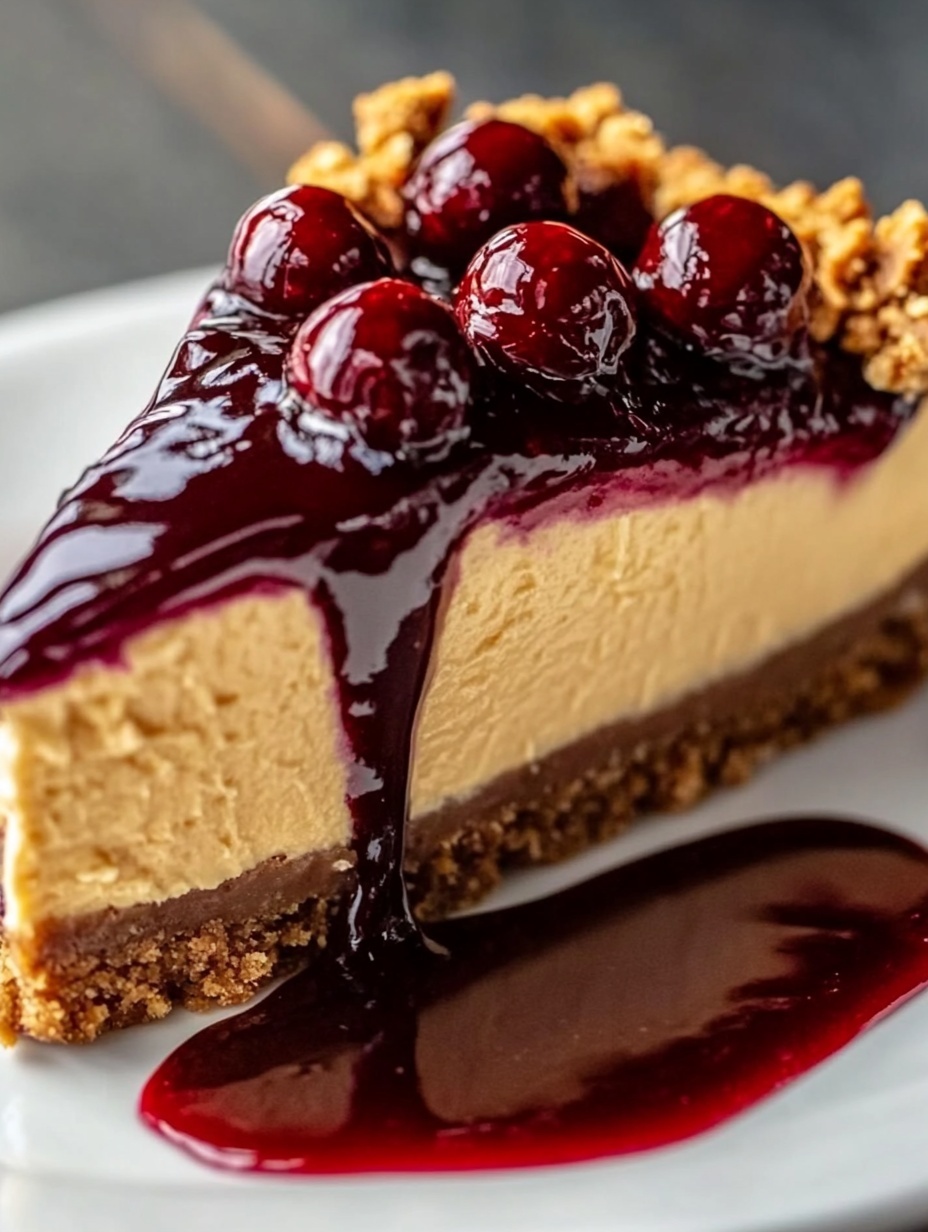
This Peanut Butter and Jelly Cheesecake combines the nostalgic flavors of a childhood favorite with the indulgence of a classic dessert. A buttery crust holds a creamy peanut butter filling, topped with a glossy layer of jelly. Simple to prepare, affordable, and customizable, it is a dessert that pleases both kids and adults.
- Total Time: 1 hour 20 minutes
- Yield: 12 1x
Ingredients
- 2 cups graham cracker crumbs (or digestive biscuits)
- ½ cup unsalted butter, melted
- 24 oz cream cheese, softened
- 1 cup smooth peanut butter (or crunchy for texture)
- 1 cup granulated sugar
- 3 large eggs
- 1 teaspoon vanilla extract
- ¾ cup jelly or jam (strawberry, raspberry, or grape)
Instructions
- Crush the graham crackers into fine crumbs and combine them with melted butter. Mix until the crumbs are evenly coated and press the mixture into the bottom of a springform pan. Smooth the surface using the base of a glass. Place in the refrigerator to chill.
- Preheat the oven to 325°F (160°C). In a large mixing bowl, beat the cream cheese until smooth. Add sugar and continue mixing until combined. Add the peanut butter and blend until creamy.
- Beat in the eggs, one at a time, mixing well after each addition. Stir in the vanilla extract until fully incorporated.
- Pour the filling over the prepared crust. Smooth the top with a spatula and gently tap the pan on the counter to release any air bubbles.
- Bake for 50 to 55 minutes, or until the edges are set and the center still has a slight wobble. Turn off the oven, open the door slightly, and let the cheesecake rest inside for one hour.
- Remove the cheesecake from the oven and refrigerate for at least 4 hours, preferably overnight, to allow it to set completely.
- Once chilled, spread the jelly evenly over the top of the cheesecake. Use a spatula for a smooth finish or leave it rustic for a homemade look.
- To serve, warm a sharp knife under hot water, wipe it dry, and slice clean portions.
Notes
For a crunchy twist, use crunchy peanut butter.
Chocolate cookie crumbs can be used instead of graham crackers for a richer crust.
Cracks are common in cheesecakes but can be hidden under the jelly topping.
- Prep Time: 25
- Cook Time: 55
FAQs
Can I make this cheesecake ahead of time?
Yes, this cheesecake is perfect for making ahead. In fact, it tastes even better after resting in the refrigerator overnight. You can prepare it up to two days before serving, which makes it a convenient dessert for parties or gatherings.
What type of jelly works best?
Strawberry and raspberry jelly are classic choices because they pair beautifully with peanut butter. Grape jelly is another popular option for a traditional PB&J flavor. If you want to try something different, blueberry, apricot, or even mixed berry jelly can add a unique twist.
Can I freeze Peanut Butter and Jelly Cheesecake?
Absolutely. You can freeze the cheesecake without the jelly topping for up to two months. Wrap it tightly in plastic wrap, then in foil to prevent freezer burn. When ready to serve, thaw in the refrigerator overnight and spread the jelly before slicing.
Do I need a springform pan?
Yes, a springform pan is recommended for cheesecakes because it allows you to release the dessert easily without damaging the crust or filling. If you don’t have one, you can use a deep pie dish, but serving may be less neat.
How can I prevent cracks in my cheesecake?
Avoid overmixing the batter and bake at a steady low temperature. Letting the cheesecake cool gradually in the oven with the door slightly open also helps minimize cracks. Even if a crack forms, the jelly topping will cover it beautifully.