

There’s something incredibly satisfying about whipping up a dessert that looks stunning, tastes divine, and doesn’t require even a second in the oven. That’s exactly what inspired me to create these No-Bake Strawberry Cheesecake Bars. On a hot day or when time is tight, I always find myself leaning toward this no-bake option—it’s effortless, refreshing, and a guaranteed crowd-pleaser.
The idea for these bars came to me one summer afternoon, right after visiting the local market where I picked up the juiciest strawberries of the season. I was craving something creamy, fruity, and sweet—but I didn’t want to heat up my kitchen. This recipe came together almost naturally, using ingredients I already had on hand, and now it’s one of my absolute favorites for gatherings, potlucks, or lazy weekends when I want a dessert that impresses with very little effort.
Why You Will Love This Recipe
These no-bake strawberry cheesecake bars tick all the right boxes. They’re silky, sweet, and just the right amount of tangy from the cream cheese. The buttery biscuit base gives the bars structure, while the strawberry topping adds a burst of freshness and natural color. Every bite offers a creamy texture that melts in your mouth, followed by the subtle crunch of the base.
Beyond the flavor, this recipe is simple to make and doesn’t require any advanced baking skills. You’ll love how quickly it comes together, and cleanup is a breeze. Whether you’re making this for a party, as a treat after dinner, or to share with friends, these bars never disappoint.
Versatile
This recipe is easy to customize. You can swap strawberries with raspberries, blueberries, or a mix of your favorite fruits. Want a citrus note? Add a bit of lemon zest to the cheesecake layer. If you prefer a nutty twist, a sprinkle of crushed almonds or pistachios on top adds texture and flavor. You can even layer the dessert in jars for a portable version.
Affordable
One of the best parts of this recipe is its cost-effectiveness. The ingredients are basic pantry and fridge staples—cream cheese, biscuits, butter, sugar, strawberries, and a bit of cream. No fancy tools are needed, and you can make a generous batch without breaking the bank.
Ingredients for the Recipe
Here’s what you’ll need to prepare the No-Bake Strawberry Cheesecake Bars:
-
200g digestive biscuits (or graham crackers), crushed
-
100g unsalted butter, melted
-
400g cream cheese, softened
-
100g powdered sugar
-
200ml heavy cream (cold)
-
1 tsp vanilla extract
-
250g fresh strawberries, hulled and sliced
-
2 tbsp sugar (for the strawberry topping)
-
1 tbsp lemon juice
-
1 tsp gelatin (optional, for topping stability)
How to Prepare This Recipe
One of the best things about this recipe is how incredibly simple and fast it is to prepare. You won’t need an oven, and the ingredients come together in a few easy steps. This dessert sets beautifully in the refrigerator, making it an ideal make-ahead treat. Whether you’re a seasoned baker or just starting out, this recipe is approachable and rewarding.
Step-by-Step Instructions for Preparation
Step 1: Prepare the Base
Begin by preparing the biscuit crust. In a medium bowl, combine 200g of crushed digestive biscuits with 100g of melted butter. Stir the mixture until all the crumbs are evenly coated and resemble wet sand.
Transfer the crumb mixture into a lined square baking tin (about 20×20 cm). Press it down firmly using the back of a spoon or the bottom of a flat glass to form an even layer. Place the pan in the refrigerator while you prepare the cheesecake filling. This allows the base to firm up.
Step 2: Make the Cheesecake Layer
In a large mixing bowl, beat 400g of softened cream cheese with 100g of powdered sugar until the mixture becomes smooth and creamy. This step helps remove any lumps from the cream cheese.
Add 1 tsp of vanilla extract and continue mixing until well incorporated. In a separate bowl, whip 200ml of cold heavy cream until stiff peaks form. This gives the cheesecake its airy, mousse-like texture.
Gently fold the whipped cream into the cream cheese mixture. Do not overmix. Use a spatula to combine the two mixtures with light, sweeping motions to maintain the fluffiness of the whipped cream.
Once the mixture is smooth and fluffy, pour it over the chilled biscuit base. Spread it evenly with a spatula or the back of a spoon. Place the pan back in the fridge for at least 4 hours, or until the cheesecake layer is firm to the touch.
Step 3: Prepare the Strawberry Topping
While the cheesecake layer chills, prepare the topping. In a small saucepan, combine 250g of fresh strawberries (hulled and sliced) with 2 tbsp of sugar and 1 tbsp of lemon juice. Cook over medium heat for about 5–7 minutes, stirring frequently, until the strawberries release their juices and begin to break down.
If you prefer a smoother topping, mash the strawberries slightly with a fork or blend them briefly using an immersion blender. If you want a firmer topping, dissolve 1 tsp of gelatin in 2 tbsp of water, let it bloom for 5 minutes, then stir it into the warm strawberry mixture. Allow the topping to cool slightly at room temperature.
Once cooled, pour the strawberry topping over the firm cheesecake layer and spread it evenly. Return the pan to the fridge for another hour to allow the topping to set.
Step 4: Slice and Serve
When fully chilled and set, lift the cheesecake from the pan using the edges of the parchment paper. Use a sharp knife to cut into squares or bars. For clean cuts, wipe the knife with a damp cloth between slices.
Serve the bars cold. Store any leftovers in an airtight container in the refrigerator for up to 4 days.
Quick and Easy
This no-bake cheesecake requires minimal tools, no special techniques, and no oven time. From prep to plating, the steps are intuitive and beginner-friendly. It’s perfect for busy days or when you want a fuss-free dessert.
Customizable
You can tailor this recipe to fit your taste. Use different fruits like raspberries, blackberries, or mango for the topping. Swap vanilla extract with almond or citrus flavors. You can even use chocolate biscuits for the base if you want a richer, cocoa twist. Add a layer of fruit compote between the base and the cheesecake for more depth.
Popular With Many People
These bars are a guaranteed hit at family gatherings, afternoon tea, or as a picnic dessert. Their pretty layers and vibrant color make them visually appealing, while the creamy texture and refreshing flavor make them irresistible. Because they’re served cold, they’re especially popular in warmer months.
Print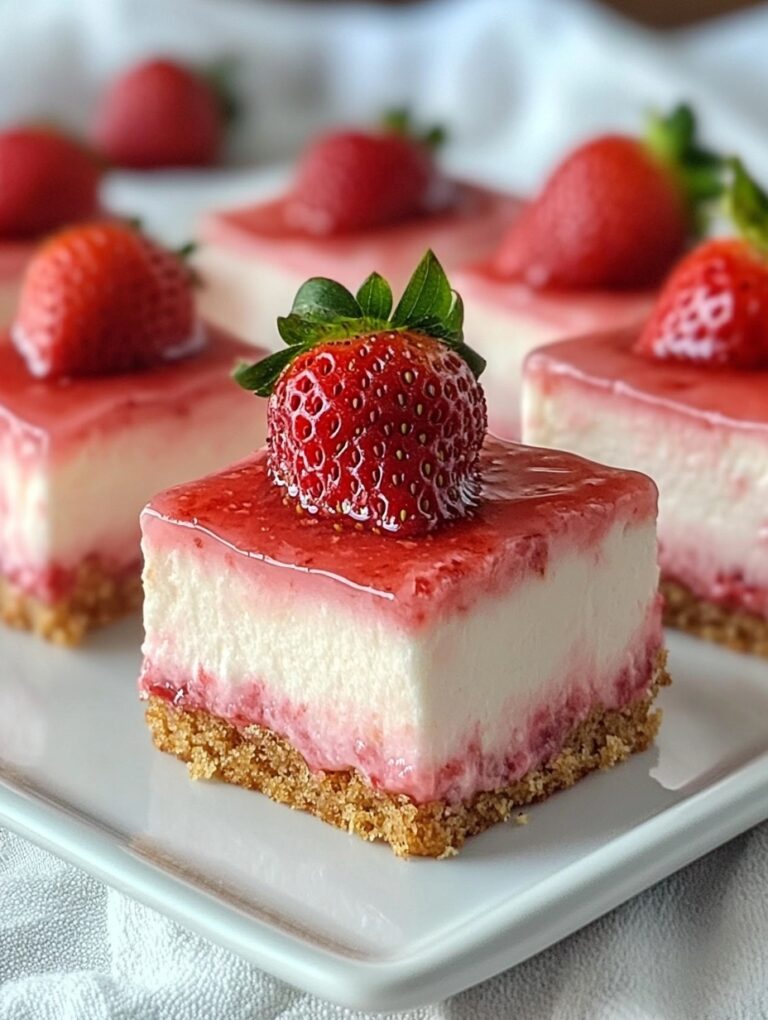
No-Bake Strawberry Cheesecake Bars
These No-Bake Strawberry Cheesecake Bars are the perfect solution when you need a dessert that’s fresh, indulgent, and easy to make. They require no baking, which makes them ideal for hot days or when time is limited. A crunchy biscuit base, a smooth and creamy cheesecake layer, and a glossy strawberry topping come together to create a show-stopping treat. Every bite melts in your mouth and delivers the perfect balance of sweetness and fruitiness. I love making these ahead of time for family dinners or gatherings—they’re always a hit.
- Total Time: 35 minutes
- Yield: 12 1x
Ingredients
For the base:
- 200g digestive biscuits (or graham crackers), crushed
- 100g unsalted butter, melted
For the cheesecake filling:
- 400g cream cheese, softened
- 100g powdered sugar
- 200ml heavy cream, cold
- 1 tsp vanilla extract
For the strawberry topping:
- 250g fresh strawberries, hulled and sliced
- 2 tbsp sugar
- 1 tbsp lemon juice
- 1 tsp gelatin (optional, for a firmer topping)
Instructions
- 1. Prepare the biscuit base:
Line a 20×20 cm square baking tin with parchment paper. In a mixing bowl, combine the crushed digestive biscuits and melted butter. Mix until the crumbs are evenly coated and resemble wet sand. Transfer the mixture into the prepared tin and press it down firmly with the back of a spoon to form a flat base. Refrigerate while preparing the filling. - 2. Make the cheesecake filling:
In a large bowl, beat the softened cream cheese with the powdered sugar until smooth. Add the vanilla extract and mix well. In a separate bowl, whip the cold heavy cream until stiff peaks form. Gently fold the whipped cream into the cream cheese mixture until combined. Spread the mixture evenly over the chilled biscuit base. Smooth the top and refrigerate for at least 4 hours until set. - 3. Prepare the strawberry topping:
In a saucepan over medium heat, combine the sliced strawberries, sugar, and lemon juice. Cook for 5–7 minutes, stirring often, until the strawberries break down and release their juices. For a smoother topping, mash lightly or blend. If using gelatin, bloom it in 2 tablespoons of water for 5 minutes, then stir it into the warm strawberry mixture until fully dissolved. Allow the topping to cool to room temperature. - 4. Assemble and chill:
Once cooled, pour the strawberry topping over the firm cheesecake layer. Spread it evenly. Return the pan to the refrigerator for at least 1 more hour to allow the topping to set. - 5. Slice and serve:
Lift the cheesecake out of the tin using the parchment paper edges. Cut into bars using a sharp knife. For clean edges, wipe the blade between cuts. Serve cold. Store leftovers in an airtight container in the refrigerator.
Notes
To substitute the base, graham crackers, tea biscuits, or similar crisp cookies can be used.
Replace pork-based ingredients with beef alternatives if adapting for dietary preferences.
This dessert does not require baking and is best served chilled.
Gelatin is optional; omit it for a more natural, softer topping.
- Prep Time: 25
- Cook Time: 10
FAQs
Can I make these bars in advance?
Yes, absolutely. These cheesecake bars are perfect for making a day ahead. In fact, chilling them overnight helps the layers set even better. Simply keep them in the refrigerator in a covered container until you’re ready to serve.
What can I use instead of digestive biscuits?
If digestive biscuits aren’t available, graham crackers or any plain, crisp cookie like tea biscuits or Maria biscuits will work just as well. The key is to use something dry and crunchy that forms a firm base once combined with butter.
Can I freeze these cheesecake bars?
Yes, they freeze well. After cutting into bars, wrap each piece in parchment paper and store in an airtight container. Thaw in the refrigerator for a few hours before serving. However, note that the texture of the strawberries on top may soften slightly after freezing.
Is it possible to make this recipe without gelatin?
Definitely. The gelatin is optional and only helps the strawberry topping hold its shape more firmly. If you prefer a more natural topping or a softer texture, feel free to leave it out. The bars will still set well in the fridge.
How can I make this dessert lighter?
You can use light cream cheese and reduced-fat cream if you’d like a lighter version. Keep in mind that the texture may be slightly less rich, but still delicious. Avoid using completely fat-free products, as they tend not to set as well.
Can I use frozen strawberries?
Yes, frozen strawberries work too. Thaw them first and drain any excess liquid before cooking them into the topping. You may need to cook the mixture slightly longer to evaporate the additional moisture.
How long do these bars last?
When stored in the refrigerator in an airtight container, these bars stay fresh for up to 4 days. If frozen, they can last up to 1 month. For best taste and texture, serve chilled and consume within a few days of making.