
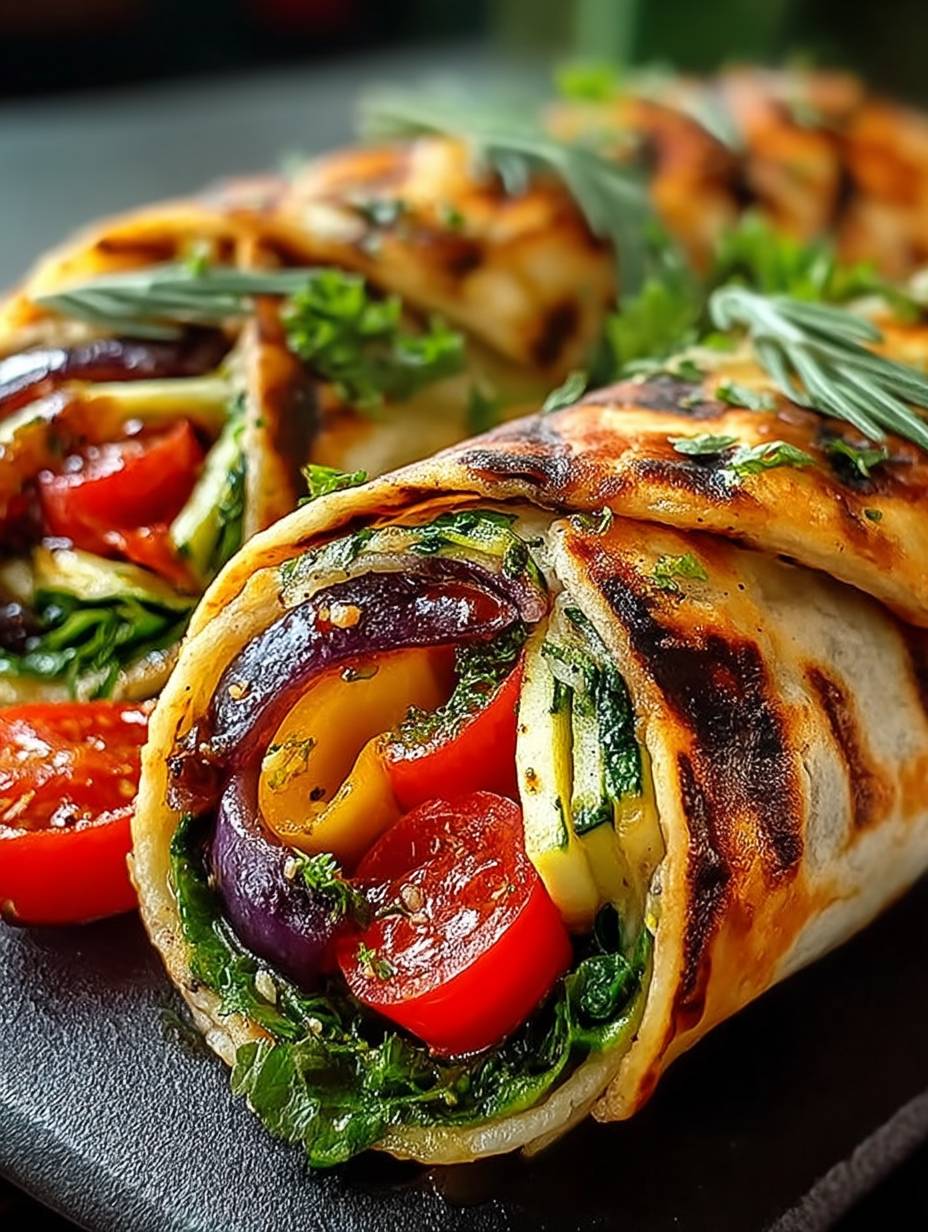
Imagine biting into a warm, soft wrap filled with smoky grilled vegetables, their flavors bursting and mingling in your mouth like a joyous dance party. With each bite, you experience tender zucchini, vibrant bell peppers, and charred onions—all perfectly balanced with creamy hummus or tangy feta, depending on your mood.
This dish brings back memories of summer picnics where my friends and I would compete over the best veggie wrap creation. Spoiler alert: mine always won, but it was mostly because I snuck extra garlic into the hummus while they were distracted by the potato salad. Classic move!
Why You’ll Love This Recipe
This Grilled Vegetable Wrap is a breeze to whip up—perfect for busy weeknights or laid-back weekends. The unique flavor profile combines smoky, savory notes that tantalize your taste buds while looking stunning enough to impress your brunch guests. Plus, these wraps are incredibly versatile; mix and match your favorite veggies or spreads to create a custom masterpiece tailored just for you.
Ingredients for Grilled Vegetable Wrap
Here’s what you need for this delicious dish:
How to Make Grilled Vegetable Wrap
Follow these simple steps to prepare this delicious dish:
Step 1: Prepare Your Grill
Preheat your grill to medium-high heat (about 400°F). If you’re using a grill pan on the stovetop, heat it until it’s nice and hot—not too much like a sauna but just enough to make those veggies sizzle.
Step 2: Chop the Vegetables
Slice zucchini into half-moons about half an inch thick. Cut bell peppers into strips and slice red onion into thick wedges. You want them chunky enough to keep their shape on the grill but not so big they’ll take forever to cook.
Step 3: Toss with Olive Oil
In a large mixing bowl, drizzle about two tablespoons of olive oil over your chopped vegetables. Sprinkle generously with salt and pepper. Toss them well until every piece is coated—rub-a-dub-dub! This step ensures nothing sticks to the grill while giving those veggies some love.
Step 4: Grill Those Veggies
Place the veggies directly on the grill or in your hot grill pan. Grill for about 5-7 minutes per side until they’re nicely charred and tender—think beautiful grill marks like they’ve been sunbathing! Use tongs to turn them occasionally so they get evenly cooked.
Step 5: Assemble Your Wrap
Once the veggies are grilled to perfection, remove them from heat and let them cool slightly. Spread a generous layer of hummus onto each tortilla wrap (the more, the merrier!). Then pile on those gorgeous grilled veggies like you’re building a flavorful tower!
Step 6: Roll It Up
Starting from one end, carefully roll up each tortilla tightly around the filling—kind of like wrapping up a burrito but without any tortilla drama! You can slice them in half diagonally for easier handling or serve whole if you’re feeling fancy.
Serve immediately while they’re still warm! Garnish with fresh herbs like parsley or cilantro if you want an extra touch—because who doesn’t love those Instagrammable moments? Enjoy your delightful Grilled Vegetable Wraps as a light lunch or dinner that’s sure to be loved by all!
Perfecting the Cooking Process
To create a superb Grilled Vegetable Wrap, grill your vegetables in batches. Start with denser options like bell peppers and zucchini, then add softer veggies like mushrooms. This ensures even cooking and prevents sogginess.
Add Your Personal Touch
Feel free to swap out the bell peppers for colorful cherry tomatoes or use spinach instead of lettuce. You can also experiment with different sauces like hummus or tzatziki for extra flavor.
Storage & Reheating

To maintain the crunch of your Grilled Vegetable Wrap, store the wraps and fillings separately. Only assemble them just before serving to keep everything fresh and crispy.
Helpful Chef Tips
I once hosted a picnic where my friends devoured these Grilled Vegetable Wraps in minutes, leaving me with nothing but crumbs and laughter echoing through the park. What a day!
Conclusion for Grilled Vegetable Wrap
The Grilled Vegetable Wrap is a delightful way to enjoy fresh, vibrant flavors while being both nutritious and satisfying. Packed with colorful veggies and protein-rich alternatives, this wrap makes for a perfect lunch or light dinner. Its versatility allows you to customize the fillings according to your taste preferences and seasonal produce. Imagine biting into a warm, grilled wrap that bursts with flavor and texture! Don’t wait any longer—try this recipe today and elevate your mealtime experience with a healthy twist. Your taste buds will thank you!
Print
Grilled Vegetable Wrap
Delicious grilled vegetable wrap recipe with detailed instructions and nutritional information.
- Total Time: 1 hour
- Yield: 4 servings 1x
Ingredients
- 2 medium zucchini
- 3 bell peppers (red, yellow, and green)
- 1 large red onion
- 2 tablespoons olive oil
- 1 cup hummus
- 4 large whole wheat or spinach tortilla wraps
Instructions
- Prepare all ingredients for grilled vegetable wrap.
- Follow the preparation steps as described in the recipe.
- Cook according to the specified time and temperature.
- Serve and enjoy your delicious meal.
Notes
Store wraps in airtight containers.
Reheat in a skillet for crunch.
Serve with a refreshing dip.
Use seasonal veggies for freshness.
- Prep Time: 30 minutes
- Cook Time: 30 minutes
- Method: Grill
Nutrition
- Calories: 250 kcal
- Sugar: 8g
- Sodium: 200mg
- Fat: 10g
- Carbohydrates: 35g
- Fiber: 3g
- Protein: 5g
- Cholesterol: 25mg
FAQs
What type of vegetables work best in a Grilled Vegetable Wrap?
For a delicious Grilled Vegetable Wrap, consider using bell peppers, zucchini, mushrooms, and eggplant. These vegetables grill beautifully and enhance the flavor of the wrap. Feel free to mix in other favorites like spinach or onions. The key is to choose vegetables that hold up well when grilled, ensuring they add both taste and nutrition to your meal.
Can I use a different type of wrap for my Grilled Vegetable Wrap?
Absolutely! While whole wheat wraps are a great choice, you can also use spinach wraps, corn tortillas, or even lettuce leaves for a low-carb option. Choose whichever type suits your dietary needs and personal preferences. The versatility of this recipe allows you to experiment with various wraps while still enjoying the delicious grilled veggies inside.
How can I store leftover Grilled Vegetable Wraps?
To store leftover Grilled Vegetable Wraps, wrap them tightly in plastic wrap or place them in an airtight container. They can be kept in the refrigerator for up to three days. When you’re ready to eat them again, simply reheat in a skillet over medium heat until warmed through. This will help restore some of the original grill flavor and texture.
Can I make the filling ahead of time?
Yes! You can prepare the filling for your Grilled Vegetable Wrap ahead of time. Grill your chosen vegetables and let them cool before storing them in an airtight container in the refrigerator. This way, when you’re ready to assemble your wraps, everything will be ready to go, making mealtime quick and convenient without sacrificing flavor.