
There’s something nostalgic and utterly comforting about cherry desserts. Whenever I make these Cherry Bars with Almond, I’m transported back to family gatherings where a simple homemade treat brought everyone to the table. These bars are a beautiful balance of sweet, tart cherry filling and the subtle nuttiness of almonds, all tucked into a buttery, tender crust. They are just the right mix of soft and slightly chewy, with a golden top that offers a delicate crunch. This is a recipe I’ve made time and again—not just because it’s delicious, but because it always gets asked for.
Why you will love this recipe:
You’re going to fall in love with this one! First off, it’s incredibly easy to make, yet it looks like something from a bakery window. The almond extract gives it that warm, aromatic finish, while the cherry preserves lend a juicy brightness that cuts through the richness of the crust. Whether you serve them warm from the oven or chilled the next day, these bars always deliver big flavor. They’re not too sweet, just sweet enough, and every bite has a blend of textures that keeps you coming back for more.
Versatile:
One of the best things about these Cherry Bars with Almond is how versatile they are. I’ve made them for brunches, afternoon coffee breaks, holiday cookie trays, and even baby showers. You can switch up the fruit preserves depending on what you have on hand—raspberry, apricot, or blueberry also work beautifully. If you prefer a nut-free version, just leave out the sliced almonds or replace them with a bit of streusel topping.
Affordable:
You won’t need anything fancy to make this recipe, which is another reason I come back to it so often. Most of the ingredients are pantry staples—flour, sugar, butter, and eggs. Even the cherry preserves and almond extract are reasonably priced and easy to find in any supermarket. With just a few simple ingredients, you’ll have a whole tray of bakery-style bars without spending a fortune.
Ingredients for the recipe:
-
All-purpose flour
-
Granulated sugar
-
Unsalted butter
-
Large eggs
-
Cherry preserves (or cherry pie filling)
-
Almond extract
-
Baking powder
-
Salt
-
Sliced almonds (optional, for topping)
-
Powdered sugar (optional, for glaze)
How to Prepare This Recipe
Making these Cherry Bars with Almond is one of the simplest baking projects I turn to when I want something quick, comforting, and sure to impress. Everything comes together in a single mixing bowl, and the layering process is straightforward, even for beginner bakers. From mixing to baking, the process flows easily, and you’ll have a warm, golden tray of cherry bars in no time.
Step-by-Step Instructions for Preparation:
Step 1: Preheat and Prep
Start by preheating your oven to 350°F (175°C). Lightly grease a 9×13-inch baking pan or line it with parchment paper for easy removal later. This helps ensure the bars don’t stick, making cleanup effortless.
Step 2: Cream Butter and Sugar
In a large mixing bowl, cream together the unsalted butter and granulated sugar until the mixture becomes light and fluffy. This step is essential for achieving a soft, tender texture. Use an electric mixer on medium speed for best results.
Step 3: Add Eggs and Almond Extract
Crack in the eggs, one at a time, mixing well after each addition. Then, stir in the almond extract. The almond flavor is delicate but distinct—it brings out the natural sweetness of the cherries beautifully.
Step 4: Mix the Dry Ingredients
In a separate bowl, whisk together the all-purpose flour, baking powder, and salt. Slowly incorporate this dry mixture into the butter-sugar-egg mixture. Stir until everything is well combined and a thick batter forms. It should be soft and spreadable.
Step 5: Spread the Batter
Take about two-thirds of the batter and spread it evenly into the prepared baking pan. Use a spatula or the back of a spoon to smooth it out—this will form the base layer of the bars.
Step 6: Add the Cherry Layer
Spread the cherry preserves evenly over the batter. Be gentle to avoid disturbing the base layer. If using cherry pie filling instead, make sure to distribute the cherries evenly across the surface.
Step 7: Top with Remaining Batter
Drop spoonfuls of the remaining batter over the cherry layer. You don’t need to spread it perfectly—it should look slightly rustic, with the cherry peeking through in places.
Step 8: Sprinkle with Sliced Almonds
Sprinkle the top with sliced almonds for added texture and flavor. They’ll toast slightly during baking and add a lovely crunch.
Step 9: Bake
Place the pan in the preheated oven and bake for 30–35 minutes, or until the top is golden brown and a toothpick inserted in the center comes out clean. Keep an eye on the edges—they should be lightly browned but not overdone.
Step 10: Cool and Glaze (Optional)
Allow the bars to cool completely in the pan. If desired, drizzle a simple glaze made from powdered sugar and milk over the top once cooled. This adds an extra layer of sweetness and visual appeal.
Quick and Easy:
What I love most about this recipe is how quickly it comes together. There’s no chilling, no layering tricks, and no special tools needed. From pantry to oven in under 15 minutes, this is one of my go-to recipes when I need something in a hurry.
Customizable:
You can easily adapt these bars to suit different tastes or dietary needs. Swap the cherry preserves for raspberry or peach. Use gluten-free flour for a gluten-friendly option. Skip the almonds for a nut-free version, or add a touch of cinnamon for a hint of spice.
Popular with Many People:
Every time I’ve brought these bars to a gathering, they disappear fast. The balance of tart cherry and sweet almond is loved by kids and adults alike. They slice beautifully into squares, making them ideal for lunchboxes, bake sales, and family desserts. Whether you’re making them for a crowd or just for your own treat stash, these bars always bring smiles.

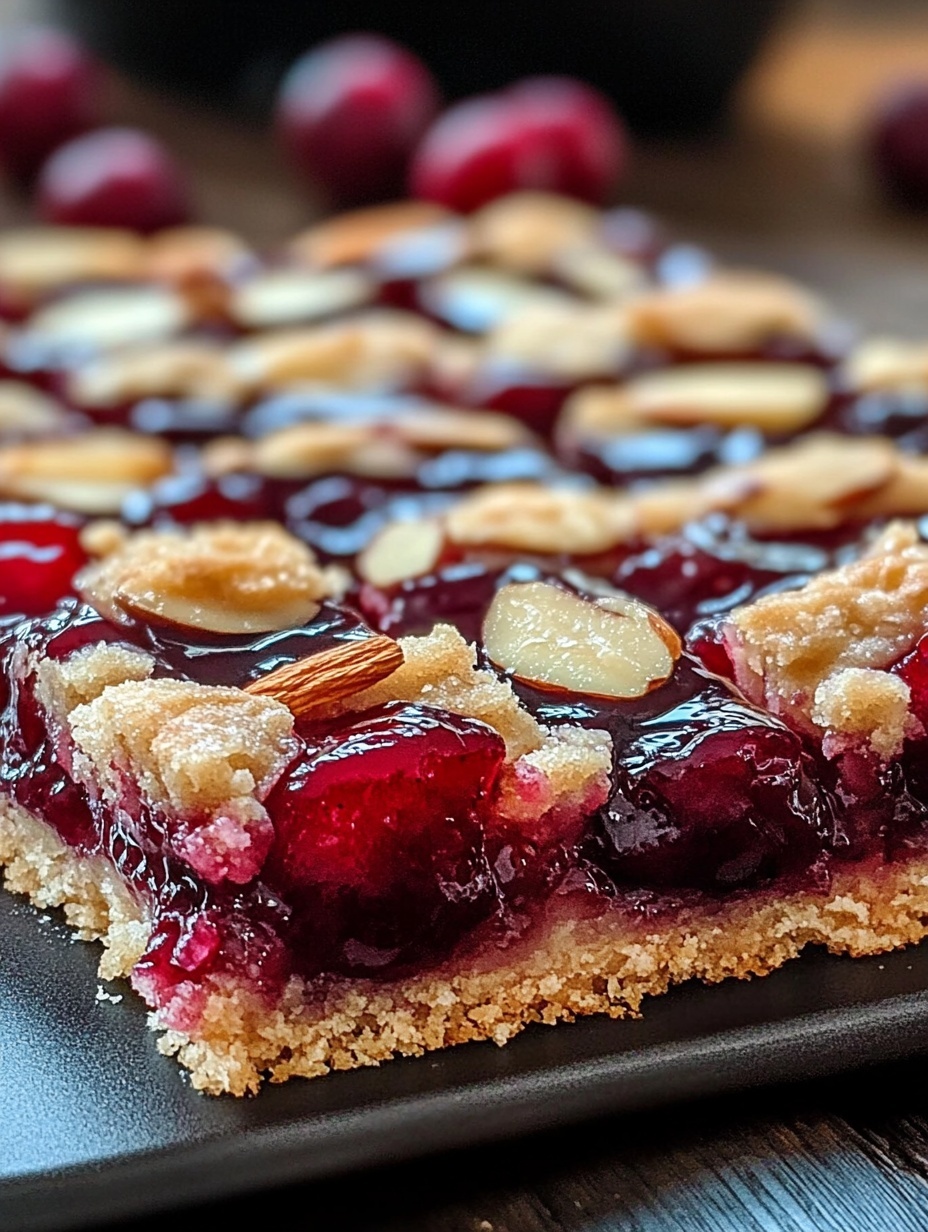
Cherry Bars with Almond
These Cherry Bars with Almond are soft, buttery dessert bars layered with sweet cherry preserves and a hint of almond flavor. Topped with toasted sliced almonds and optionally drizzled with a light glaze, they’re the perfect blend of fruit, nut, and tender cake. Easy to prepare, budget-friendly, and loved by all, these bars are ideal for bake sales, holidays, or everyday sweet cravings.
- Total Time: 50 minutes
- Yield: 24 1x
Ingredients
- 2 1/2 cups all-purpose flour
- 1 1/2 cups granulated sugar
- 1 cup unsalted butter, softened
- 4 large eggs
- 1 teaspoon almond extract
- 1 teaspoon baking powder
- 1/2 teaspoon salt
- 1 can (21 oz) cherry preserves or cherry pie filling
- 1/2 cup sliced almonds (optional, for topping)
- 1/2 cup powdered sugar (optional, for glaze)
- 1–2 tablespoons milk (for glaze, optional)
Instructions
- Preheat the oven to 350°F (175°C). Lightly grease a 9×13-inch baking pan or line it with parchment paper.
- In a large mixing bowl, cream the softened butter and granulated sugar together until light and fluffy. Use a hand mixer or stand mixer for best results.
- Add the eggs one at a time, mixing well after each addition. Stir in the almond extract.
- In a separate bowl, whisk together the flour, baking powder, and salt. Gradually add the dry ingredients to the wet mixture, stirring until a thick batter forms.
- Spread two-thirds of the batter evenly into the prepared pan, smoothing it out with a spatula.
- Spoon the cherry preserves or cherry pie filling evenly over the batter layer, spreading gently without mixing layers.
- Drop spoonfuls of the remaining batter over the cherry layer. It’s fine if some of the cherry shows through.
- Sprinkle sliced almonds over the top, if using.
- Bake for 30 to 35 minutes, or until the top is golden and a toothpick inserted in the center comes out clean.
- Let the bars cool completely in the pan.
- (Optional) For the glaze: mix powdered sugar with milk until smooth, then drizzle over the cooled bars before slicing.
Notes
Do not overmix the batter once the dry ingredients are added.
For a nut-free version, omit the sliced almonds.
These bars are easy to freeze and serve later—wrap them tightly and freeze for up to 2 months.
If using cherry pie filling, try to spread the fruit evenly for balanced flavor in each bite.
- Prep Time: 15
- Cook Time: 35
FAQs
Can I use fresh cherries instead of preserves?
Yes, you can. Simply cook down fresh cherries with a bit of sugar and cornstarch until thickened, then use as you would with preserves. It adds a fresher flavor, though it takes a little more prep time.
Can I make these cherry bars gluten-free?
Absolutely. Just substitute the all-purpose flour with a 1:1 gluten-free baking blend. Be sure the blend includes xanthan gum for best results.
How long do cherry bars last?
Stored in an airtight container at room temperature, they stay fresh for up to 3 days. If you refrigerate them, they’ll last up to 5 days. You can also freeze them for up to 2 months—just thaw before serving.
What can I use instead of almond extract?
If you need an alternative, try vanilla extract or even lemon zest for a different flavor profile. The almond extract adds a unique aroma, but the bars are still delicious without it.
Can I double the recipe?
Yes, this recipe doubles well. Just use a larger pan or two 9×13-inch pans, and be sure to adjust baking time slightly if using a deeper pan.
Do I need to add the sliced almonds on top?
No, the almonds are optional. They add a lovely crunch and extra almond flavor, but you can leave them off or replace them with a light streusel topping or coarse sugar.
Can I make the batter ahead of time?
It’s best to bake the bars right after preparing the batter. However, you can mix the dry ingredients and wet ingredients separately a day in advance and combine them just before baking.