

There’s something uniquely nostalgic and heartwarming about baking cookies that take me right back to childhood. Pistachio Pudding Cookies are one of those recipes that feel like a little green hug—soft, chewy, and packed with flavor. I remember the first time I made these: it was during a spring afternoon when I craved something sweet but a little different from the usual chocolate chip. That’s when I reached for a box of instant pistachio pudding mix and decided to experiment. The result was absolutely delightful—light green cookies with the perfect balance of sweetness and nuttiness, and ever since then, they’ve become a regular treat in my kitchen.
Why you will love this recipe:
These Pistachio Pudding Cookies are soft-baked and stay chewy for days. The pudding mix gives them an unbeatable texture and just the right hint of pistachio flavor—mellow, slightly nutty, and wonderfully aromatic. Whether you bake them for the holidays, a family gathering, or just a weekday pick-me-up, they never disappoint. Plus, they’re different from the usual cookie options, making them a standout on any dessert tray.
Versatile:
What I adore most about this recipe is its versatility. You can dress them up with white chocolate chips, chopped nuts, or even a drizzle of glaze for added flair. They’re also perfect for shaping into festive cookie-cutter designs or rolling in sugar for a sparkling touch. You can even switch the flavor by using a different variety of pudding mix, though pistachio remains my top choice.
Affordable:
Another reason I keep coming back to this recipe is how affordable and pantry-friendly it is. Most of the ingredients are items I already have on hand, and a single box of pudding mix goes a long way. It’s an inexpensive way to create a delicious homemade dessert without needing any special equipment or hard-to-find ingredients.
Ingredients for the recipe:
Here’s what you’ll need to make these soft and chewy Pistachio Pudding Cookies:
-
All-purpose flour
-
Baking soda
-
Salt
-
Unsalted butter (softened)
-
Granulated sugar
-
Brown sugar
-
Instant pistachio pudding mix (not cook & serve)
-
Eggs
-
Vanilla extract
-
Chopped pistachios (optional, but recommended for extra texture)
-
White chocolate chips or semisweet chocolate chips (optional)
Once you try these cookies, I have no doubt they’ll earn a permanent spot in your baking rotation—just like they did in mine.
How to Prepare This Recipe
Making Pistachio Pudding Cookies is as enjoyable as eating them. The process is simple, quick, and perfect for both beginner bakers and seasoned home cooks. You don’t need any fancy techniques or tools—just a bowl, a hand or stand mixer, and a love for baking something soft, chewy, and a little unexpected.
Step-by-Step Instructions for Preparation
Step 1: Prepare the oven and baking sheet
Start by preheating your oven to 350°F (175°C). Line your baking sheets with parchment paper or silicone baking mats. Doing this ensures that the cookies don’t stick and bake evenly.
Step 2: Mix the dry ingredients
In a medium mixing bowl, whisk together 2 1/4 cups of all-purpose flour, 1 teaspoon of baking soda, and 1/4 teaspoon of salt. Set this dry mixture aside while you prepare the wet ingredients.
Step 3: Cream the butter and sugars
In a large mixing bowl, use a hand or stand mixer to cream 1 cup of softened unsalted butter with 3/4 cup of granulated sugar and 1/4 cup of packed brown sugar. Beat the mixture until it becomes light and fluffy. This usually takes around 2–3 minutes. Properly creaming the butter and sugar ensures the cookies are soft and airy.
Step 4: Add the pudding mix and eggs
Next, mix in one 3.4 oz (96g) box of instant pistachio pudding mix (make sure it’s the instant kind, not cook-and-serve). Beat until fully incorporated. Then, add 2 large eggs, one at a time, mixing well after each addition. Stir in 1 teaspoon of vanilla extract. The pudding mix gives the dough its signature flavor and tenderness.
Step 5: Combine the dry and wet ingredients
Slowly add the dry flour mixture into the wet ingredients. Mix on low speed just until combined. Be careful not to overmix the dough, or the cookies might turn out dense instead of soft.
Step 6: Add mix-ins (optional)
If you like added texture and flavor, fold in 1/2 to 3/4 cup of chopped pistachios and 3/4 cup of white or semisweet chocolate chips. These mix-ins are optional but take the cookies to the next level.
Step 7: Scoop and shape the dough
Use a cookie scoop or tablespoon to portion the dough onto the prepared baking sheets. Leave about 2 inches between each dough ball to allow room for spreading. For uniform results, gently roll each portion between your hands for a smooth shape.
Step 8: Bake the cookies
Bake the cookies for 9 to 11 minutes, or until the edges are just turning golden and the centers still look slightly underdone. They will continue to bake slightly on the hot sheet after removal. Do not overbake—this is key to keeping the cookies soft.
Step 9: Cool and serve
Let the cookies rest on the baking sheet for 5 minutes, then transfer them to a wire rack to cool completely. Once cooled, store them in an airtight container. They’ll stay soft for days, making them ideal for make-ahead treats or lunchbox surprises.
Quick and Easy
This entire process—from mixing the dough to baking the cookies—can be completed in under 30 minutes. That makes this recipe perfect for busy afternoons or last-minute dessert needs. You don’t even need to chill the dough, which saves even more time. And the cleanup? Minimal. One bowl for dry, one for wet, and you’re good to go.
Customizable
While pistachio is the star, this recipe welcomes your creative touch. Swap the pistachios for walnuts or pecans, add a touch of almond extract for depth, or stir in dried cranberries for a tart contrast. You could even drizzle the cooled cookies with a simple powdered sugar glaze for a bakery-style finish. It’s your canvas—make it your own.
Popular with Many People
These cookies have been a consistent crowd-pleaser wherever I’ve taken them—family reunions, bake sales, birthday parties, and casual coffee breaks. There’s something about their gentle pistachio flavor and pillow-soft texture that appeals to both kids and adults. They’re festive enough for holidays and simple enough for everyday snacking.
From the first bite, you’ll understand why this has become one of my go-to cookie recipes. It combines ease, comfort, and flavor in one neat little green package.
Print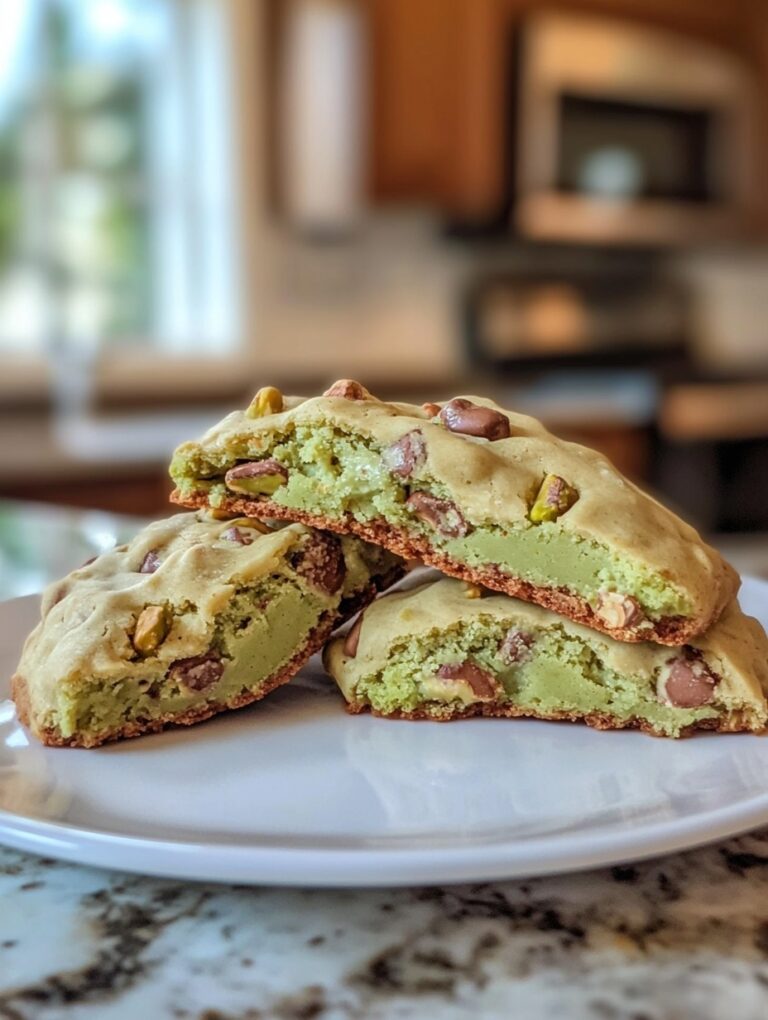
Pistachio Pudding Cookies
These Pistachio Pudding Cookies are irresistibly soft, chewy, and flavored with instant pistachio pudding mix for a sweet, nutty twist. Quick to make and full of charm, they’re perfect for parties, holidays, or a simple treat any day of the week. Optional additions like chopped pistachios or white chocolate chips make them extra special.
- Total Time: 20 minutes
- Yield: 30 1x
Ingredients
- 2 1/4 cups all-purpose flour
- 1 teaspoon baking soda
- 1/4 teaspoon salt
- 1 cup unsalted butter, softened
- 3/4 cup granulated sugar
- 1/4 cup packed brown sugar
- 1 (3.4 oz / 96g) box instant pistachio pudding mix
- 2 large eggs
- 1 teaspoon vanilla extract
- 1/2 to 3/4 cup chopped pistachios (optional)
- 3/4 cup white chocolate chips or semisweet chocolate chips (optional)
Instructions
- Preheat your oven to 350°F (175°C). Line baking sheets with parchment paper.
- In a medium bowl, whisk together the flour, baking soda, and salt. Set aside.
- In a large bowl, beat the softened butter, granulated sugar, and brown sugar together until light and fluffy (about 2–3 minutes).
- Add the instant pistachio pudding mix. Beat until fully blended.
- Add eggs one at a time, mixing well after each addition. Stir in the vanilla extract.
- Gradually add the flour mixture to the wet ingredients. Mix just until combined—do not overmix.
- Fold in chopped pistachios and chocolate chips if using.
- Scoop dough by rounded tablespoons or use a cookie scoop. Place onto prepared baking sheets, leaving space between each cookie.
- Bake for 9 to 11 minutes, until edges are lightly golden and centers are just set.
- Allow cookies to cool on the baking sheet for 5 minutes, then transfer to a wire rack to cool completely.
- Store cooled cookies in an airtight container at room temperature for up to 5 days.
Notes
You may omit the chocolate chips for a simpler cookie.
For extra festive flair, press a few chopped pistachios on top of each dough ball before baking.
These cookies freeze well. Freeze baked cookies or unbaked dough balls and bake directly from frozen.
Do not substitute cook-and-serve pudding mix; only instant pudding works in this recipe.
- Prep Time: 10
- Cook Time: 10
FAQs
Can I use a different flavor of pudding mix in this recipe?
Yes, you can easily swap the pistachio pudding mix with other instant pudding flavors such as vanilla, butterscotch, or chocolate. However, keep in mind that the final flavor and color of the cookies will change accordingly. Pistachio gives a unique nutty profile and a soft green hue that makes these cookies stand out.
Do I need to chill the cookie dough before baking?
No, chilling the dough is not required for this recipe. The dough holds its shape well and bakes perfectly without refrigeration. If you do choose to chill it, it may result in a slightly thicker cookie.
How should I store these cookies to keep them soft?
To maintain their chewy texture, store the cookies in an airtight container at room temperature. They’ll stay soft for up to 5 days. You can also add a slice of bread to the container to help retain moisture.
Can I make the dough ahead of time and freeze it?
Absolutely. You can scoop the dough into balls, freeze them on a tray, then store them in a zip-top freezer bag. When you’re ready to bake, just add an extra minute or two to the baking time—no thawing needed.