

Imagine slicing into a Pistachio Dacquoise Cake, revealing layers of nutty, airy meringue interlaced with luscious cream and a hint of sweetness that dances on your palate. The crunch of pistachios perfectly complements the smooth filling, creating an unforgettable dessert experience.
I still remember the first time I attempted this cake. I had invited friends over for what I claimed would be a “fancy dinner party.” Spoiler alert: it ended with me covered in flour and my dog eyeing the kitchen counter like it was Mount Olympus. But the end result? A showstopper that made me feel like a baking wizard, even if I had to bribe my friends with wine to help clean up the disaster zone.
Reasons Why You’ll Love This Recipe
This Pistachio Dacquoise Cake is not just easy to prepare; it’s also a delightful fusion of flavors that will impress anyone at your table. Its stunning appearance makes it the perfect centerpiece for any occasion, while its versatility allows you to customize it with your favorite fillings or toppings. Whether you’re celebrating a birthday or simply indulging yourself, this cake will leave everyone asking for seconds—and your secret recipe!
Ingredients for Pistachio Dacquoise Cake
Here’s what you need for this delicious dish:
Step-by-Step Preparation Pistachio Dacquoise Cake
Here’s a simple guide to help you prepare this delicious recipe:
Step 1: Preheat Your Oven
Preheat your oven to 325°F (160°C). Line two baking sheets with parchment paper and draw two 8-inch circles on each sheet as guides—think of them as your cake’s blueprints.
Step 2: Prepare Your Meringue
In a clean mixing bowl, beat 4 large egg whites until foamy. Gradually add 1 cup granulated sugar while continuing to beat until stiff peaks form—this is where you want those dream-like clouds! Gently fold in 1 cup ground pistachios and 1 cup powdered sugar until combined.
Step 3: Shape Your Layers
Spoon the meringue mixture into a piping bag fitted with a large round tip (or just use a zip-top bag with one corner snipped off). Pipe the mixture onto your drawn circles, creating smooth layers about half an inch thick.
Step 4: Bake
Place both baking sheets in the preheated oven and bake for about 30-35 minutes until golden brown and crisp on the outside but still chewy inside. Turn off the oven and let them cool completely inside—this step is crucial for preventing cracks!
Step 5: Whip Your Cream Filling
While waiting, whip together 2 cups heavy cream with 1 teaspoon vanilla extract until soft peaks form. Gently fold in ½ cup pistachio paste until fully incorporated, creating a rich and creamy filling.
Step 6: Assemble Your Cake
Take one layer of meringue and spread half of your whipped pistachio cream on top. Place another layer on top and repeat with remaining cream. Finish with the last meringue layer on top—this is where you can show off your architectural skills!
To serve, slice generously and garnish each piece with crushed pistachios or fresh berries if you’re feeling fancy! Enjoy every bite while pondering how you’ve just become an amateur pastry chef ready to take on any baking challenge!
Mastering the Secrets of Cooking

To achieve that perfect Pistachio Dacquoise Cake, start by whipping your egg whites until stiff peaks form. Then, gently fold in the ground pistachios to maintain volume while ensuring a smooth batter. Timing is everything; bake until golden and let it cool completely before assembly.
Make Your Recipe Unique
Transform your Pistachio Dacquoise Cake by swapping the pistachios for finely ground almonds or hazelnuts for a nutty twist. You can also experiment with different fruit purees like raspberry or mango for the filling, adding vibrant flavors and colors.
Smart Storage & Reheating
To keep your Pistachio Dacquoise Cake fresh, store it in an airtight container at room temperature for up to three days. For optimal texture, keep layers separate and only assemble right before serving to preserve that delightful crunch.
The Chef’s Golden Tips
I vividly remember the first time I made this Pistachio Dacquoise Cake for my friends. Their faces lit up like Christmas trees when they tasted it—pure joy!
Conclusion for Pistachio Dacquoise Cake
Creating a Pistachio Dacquoise Cake is not just about the delicious flavors; it’s also a celebration of textures, with the nutty crunch of pistachios and the airy meringue layers. This cake is perfect for special occasions or simply to treat yourself. By following this recipe, you can impress family and friends with your baking skills while enjoying a delightful dessert that’s light yet indulgent. Don’t wait any longer—gather your ingredients and bake this stunning cake today. You’ll love every bite!
Print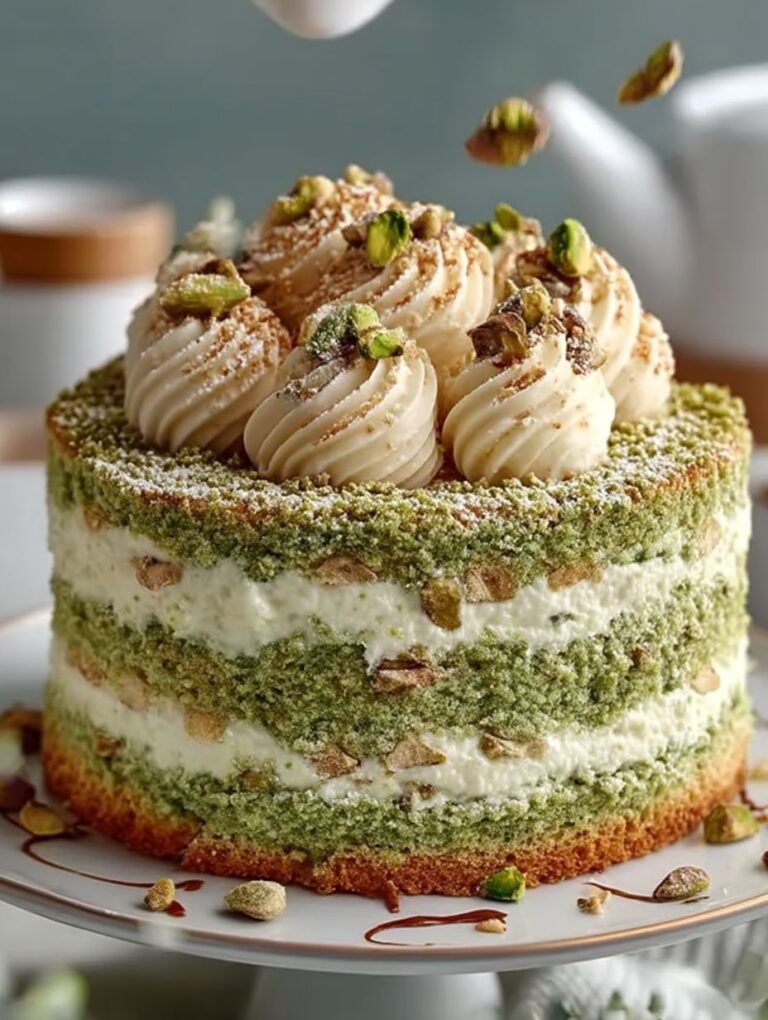
Pistachio Dacquoise Cake
Delicious pistachio dacquoise cake recipe with detailed instructions and nutritional information.
- Total Time: 2 hours 15 minutes
- Yield: 8 servings 1x
Ingredients
- 1 cup unsalted shelled pistachios, ground
- 4 large egg whites, at room temperature
- 1 cup granulated sugar
- 1 cup powdered sugar
- 2 cups heavy cream, high-fat content (at least 36%)
- ½ cup pistachio paste
- 1 teaspoon vanilla extract
- 1 teaspoon agar-agar powder
Instructions
- Preheat your oven to 325°F (160°C). Line two baking sheets with parchment paper and draw two 8-inch circles on each sheet as guides.
- In a clean mixing bowl, beat 4 large egg whites until foamy. Gradually add 1 cup granulated sugar while continuing to beat until stiff peaks form. Gently fold in 1 cup ground pistachios and 1 cup powdered sugar until combined.
- Spoon the meringue mixture into a piping bag fitted with a large round tip or use a zip-top bag with one corner snipped off. Pipe the mixture onto your drawn circles, creating smooth layers about half an inch thick.
- Place both baking sheets in the preheated oven and bake for about 30-35 minutes until golden brown and crisp on the outside but still chewy inside. Turn off the oven and let them cool completely inside.
- While waiting, whip together 2 cups heavy cream with 1 teaspoon vanilla extract until soft peaks form. Gently fold in ½ cup pistachio paste until fully incorporated.
- Take one layer of meringue and spread half of your whipped pistachio cream on top. Place another layer on top and repeat with remaining cream. Finish with the last meringue layer on top.
Notes
Store leftover cake in airtight container.
Reheat slices gently in microwave.
Serve with fresh berries and cream.
Finely grind pistachios for smoother texture.
- Prep Time: 45 minutes
- Cook Time: 90 minutes
- Method: Bake
Nutrition
- Calories: 300 kcal
- Sugar: 25g
- Sodium: 150mg
- Fat: 15g
- Carbohydrates: 40g
- Fiber: 2g
- Protein: 6g
- Cholesterol: 25mg
FAQs
How do I store leftover Pistachio Dacquoise Cake?
To store leftover Pistachio Dacquoise Cake, wrap it tightly in plastic wrap or place it in an airtight container. Keep it in the refrigerator for up to three days. For best results, enjoy the cake at room temperature for optimal flavor and texture. If you plan to keep it longer, consider freezing individual slices wrapped securely to maintain freshness.
Can I use different nuts instead of pistachios?
While this recipe features pistachios for their unique flavor and texture, you can experiment with other nuts like almonds or hazelnuts. However, keep in mind that substituting will alter the overall taste of your Dacquoise Cake. Ensure any alternative nuts are finely ground to maintain the cake’s structure.
What can I use as a substitute for eggs in this recipe?
If you need an egg substitute for the Pistachio Dacquoise Cake, consider using aquafaba (the liquid from canned chickpeas). Three tablespoons of aquafaba equal one egg. Whip it until it forms stiff peaks, similar to egg whites. This will help replicate the light texture of the cake without using eggs.
How can I make my meringue more stable?
To achieve a more stable meringue for your Pistachio Dacquoise Cake, ensure that all mixing bowls and utensils are completely clean and free from grease. Adding a teaspoon of cream of tartar while whipping can help stabilize the meringue as well. Be sure to gradually add sugar once soft peaks form to maintain volume as you beat the mixture until stiff peaks form.